Tech News
3 Steps to Link Your Bluesky Account to a Custom Domain
Quick Links
Key Takeaways
It may sound tricky, but using your own domain on Bluesky involves just three simple steps. Find out how to get a handle that stands out and confirms you are who you say you are.
Why Should I Use a Custom Domain?
On Bluesky, your handle is a domain. By default, this ends in "bsky.social," but you can change your handle to any domain you own. You don't need to use a custom domain, but it's a nice-to-have feature with several benefits.
Branding is powerful, and if you already have a domain, it can work as a form of recognition. It can also be more distinctive; you'll certainly stand out among a sea of posts from ".bsky.social" handles.
Claiming a domain works as a form of verification, ensuring that the person behind a website and the person behind a Bluesky account are one and the same. This gives your account added authority and means others can trust you more easily, safe in the knowledge that you're not impersonating somebody else.
Bluesky uses domains for handles because it builds on the AT Protocol. This may not mean an awful lot right now but, as more and more services develop to use the protocol, you should be able to connect your activity across them using your custom domain.
What Do I Need to Start?
You'll need a Bluesky account, of course, and it's worth getting to know this in-vogue social media platform before proceeding.
You'll also need a domain. If you don't already have one, you can register a domain for just a few dollars per year, and you can even use BlueSky itself as your domain provider.
How Do I Change My Handle?
Once you've got everything ready, you can change your Bluesky handle with just three steps.
1. Start the Change on Bluesky
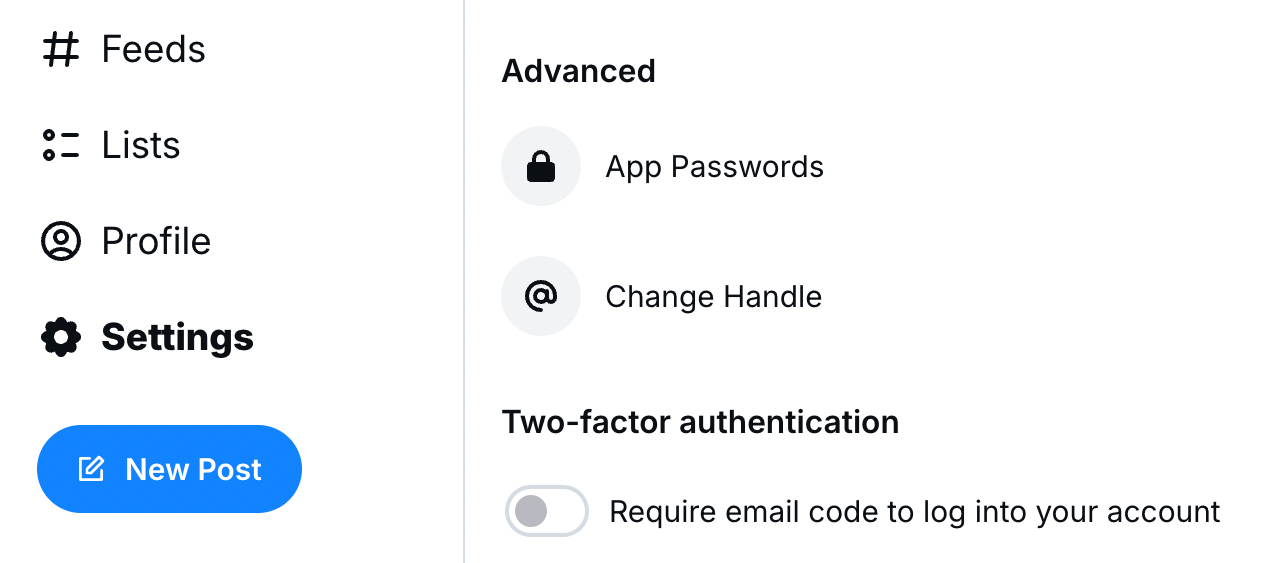
Go to Settings > Advanced > Change Handle:
Instead of entering a handle, click the link at the bottom that reads, "I have my own domain:"
2. Choose and Enact a Verification Method
This is the trickiest part of the process—both to explain and to carry out. You'll need to decide between adding a DNS record or uploading a text file to a website running at your domain. The latter is a bit easier, but you'll need a website and you'll need to ensure that file remains there. The DNS approach is cleaner, but it's a bit more complicated.
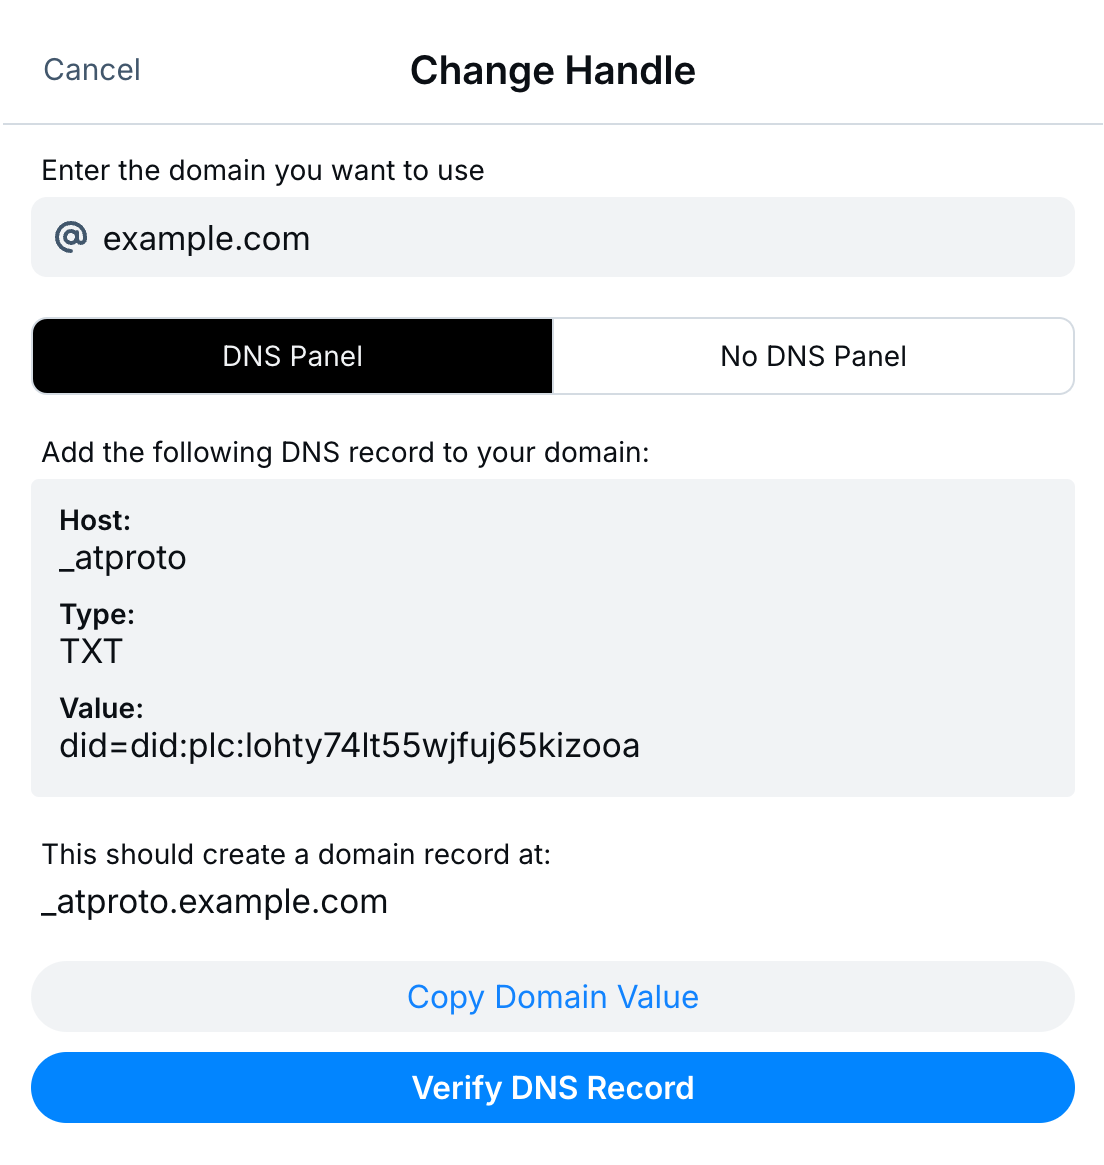
Exactly how you configure your DNS depends upon your registrar; if you've forgotten which provider this is, you may be able to find out more using the whois command or an online whois service. If you know how to add a DNS record, this should be fairly smooth since Bluesky provides all the details for you to copy and paste:
The wording may vary from one DNS service to the next. For example, my provider—Amazon’s AWS—uses "Record name" instead of "Host". Look for existing records as examples if necessary.
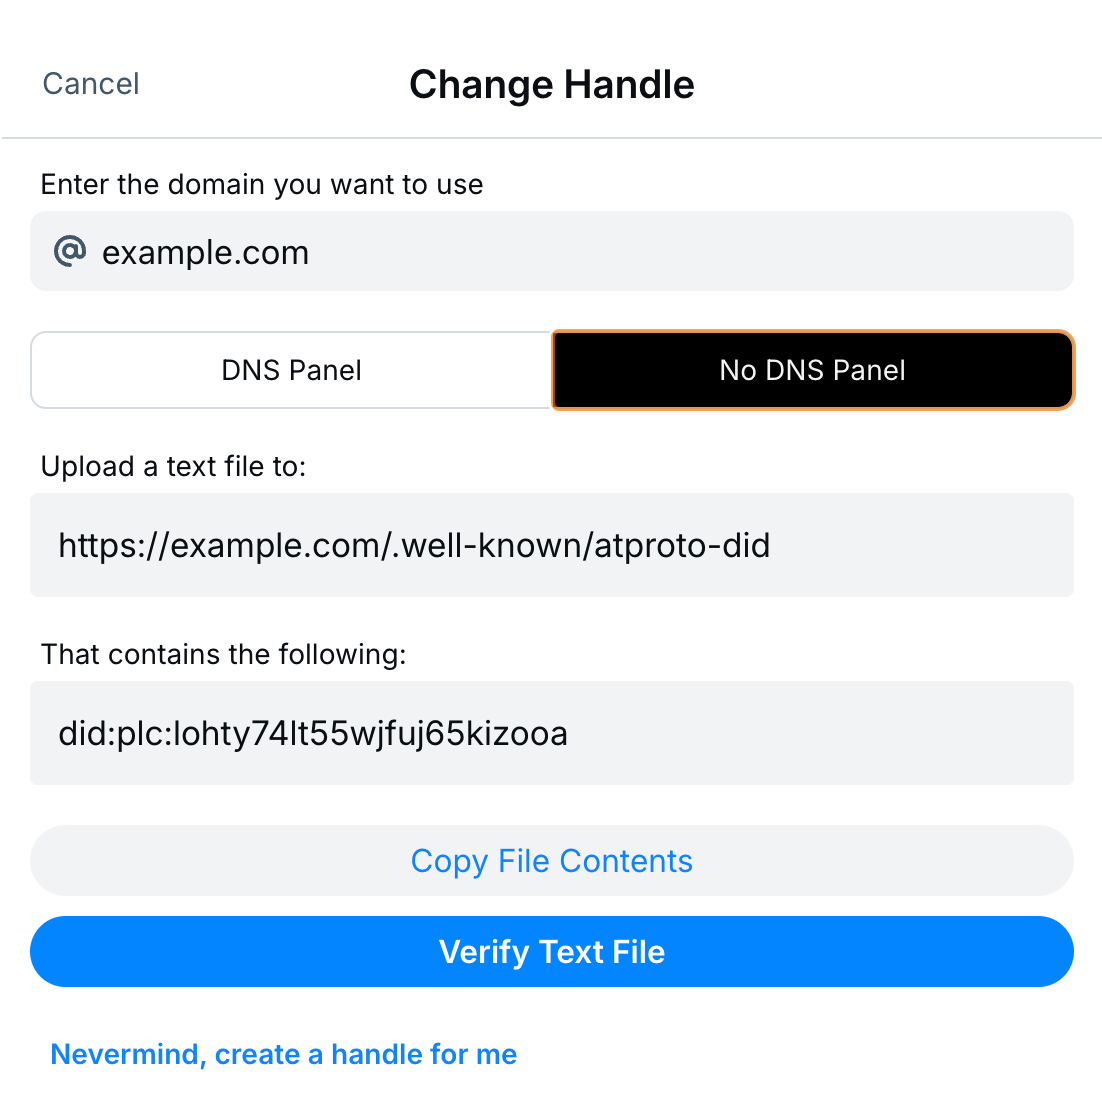
Alternatively, you can use the text file approach. This requires you to edit a file on your web server or upload one using a method like FTP or, preferably, SFTP.
Note that you'll need to save this file in a hidden directory, .well-known. This is a commonly used location for many services to provide verification or similar functions.
In case you were wondering, no, none of these details are private, so there's no danger in sharing them! The DID is simply a low-level identifier for your account that anyone can view. Without write access to your DNS or website, nobody can use these to impersonate you.
3. Verify the Change
With each approach, once you're done, click the blue Verify button (either "Verify DNS Record" or "Verify Text File"). Remember that DNS settings can take some time to propagate, so you may have to wait a few minutes (or, potentially, longer) before this will work.
When you click the button, Bluesky will verify your domain using whichever method you choose. If successful, you’ll see a green message reading "Domain verified!" with a button below it that lets you confirm the change.
When you subscribe to the blog, we will send you an e-mail when there are new updates on the site so you wouldn't miss them.


Comments