Tech News
ShadowPlay for Linux? Make Screencasts With GPU Screen Recorder
Key Takeaways
Are you looking for a screen recorder for Linux that won't slow you down? Try GPU Screen Recorder. Like ShadowPlay, it uses your GPU to capture smooth gameplay, working seamlessly on X11 or Wayland while offering plenty of valuable features.
What is GPU Screen Recorder?
GPU Screen Recorder is a lightweight screen recorder for Linux that works like ShadowPlay on Windows. It keeps everything running smoothly using your GPU for recording, so your CPU is not overloaded. Whether you're on X11 or Wayland and using AMD, Intel, or NVIDIA graphics cards, this tool has you covered.
One of the most excellent parts? You don't need an internet connection to record and capture your screen offline. It even has an "instant replay" feature, similar to ShadowPlay, letting you save the last few minutes of gameplay so you never miss a crucial moment.
Overview of GPU Screen Recorder
If you're a Linux user looking to record high-quality videos or live streams, this tool is a great choice. It supports 4K and multiple audio tracks and gives you complete control over frame rate and video quality. Using modern codecs like AV1 for video and Opus for audio, you get clear, sharp recordings without wasting your disk space.
You can choose from several video codecs (H264, HEVC, AV1, VP8, VP9) and audio codecs (Opus, AAC). Remember that you might need root access and extra permissions on Wayland. NVIDIA users could also run into a few codec or hardware restrictions, but it's still a flexible option.
Comparison to ShadowPlay on Windows
Both GPU Screen Recorder and ShadowPlay use your GPU for video encoding, keeping your CPU free for other tasks. ShadowPlay is only for NVIDIA users and includes features like Instant Replay, where you can save the last few minutes of gameplay with a quick hotkey. GPU Screen Recorder brings this same feature to Linux but skips ShadowPlay's automatic highlight detection.
What makes the GPU Screen Recorder stand out is its flexibility. It works across different platforms (AMD, Intel, and NVIDIA) and supports more video formats, like AV1, VP8, and VP9. ShadowPlay, on the other hand, sticks to H264 and HEVC but allows for higher-quality 4K and 8K recordings. If you're using NVIDIA, ShadowPlay might feel more polished, but GPU Screen Recorder offers Linux users way more flexibility.
Getting Started with GPU Screen Recorder
Setting up a GPU Screen Recorder is super easy. It's available as a Flatpak package on Flathub. If Flatpak isn't enabled on your system, head over to Flathub and follow the instructions for your OS.
Installing GPU Screen Recorder with Flatpak
Once Flatpak is ready to go, installing GPU Screen Recorder is as simple as running this command in your terminal:
flatpak install flathub com.dec05eba.gpu_screen_recorderAfter it's installed, you'll find it in your app menu, ready to use.
Recording Your Desktop
To start recording, you'll first need to choose between "Simple" or "Advanced" in the "View area." If you don't need many custom settings, "Simple" will complete the job. But if you like having more control, go with the "Advanced" view. For most casual gamers, "Simple" will be just fine.
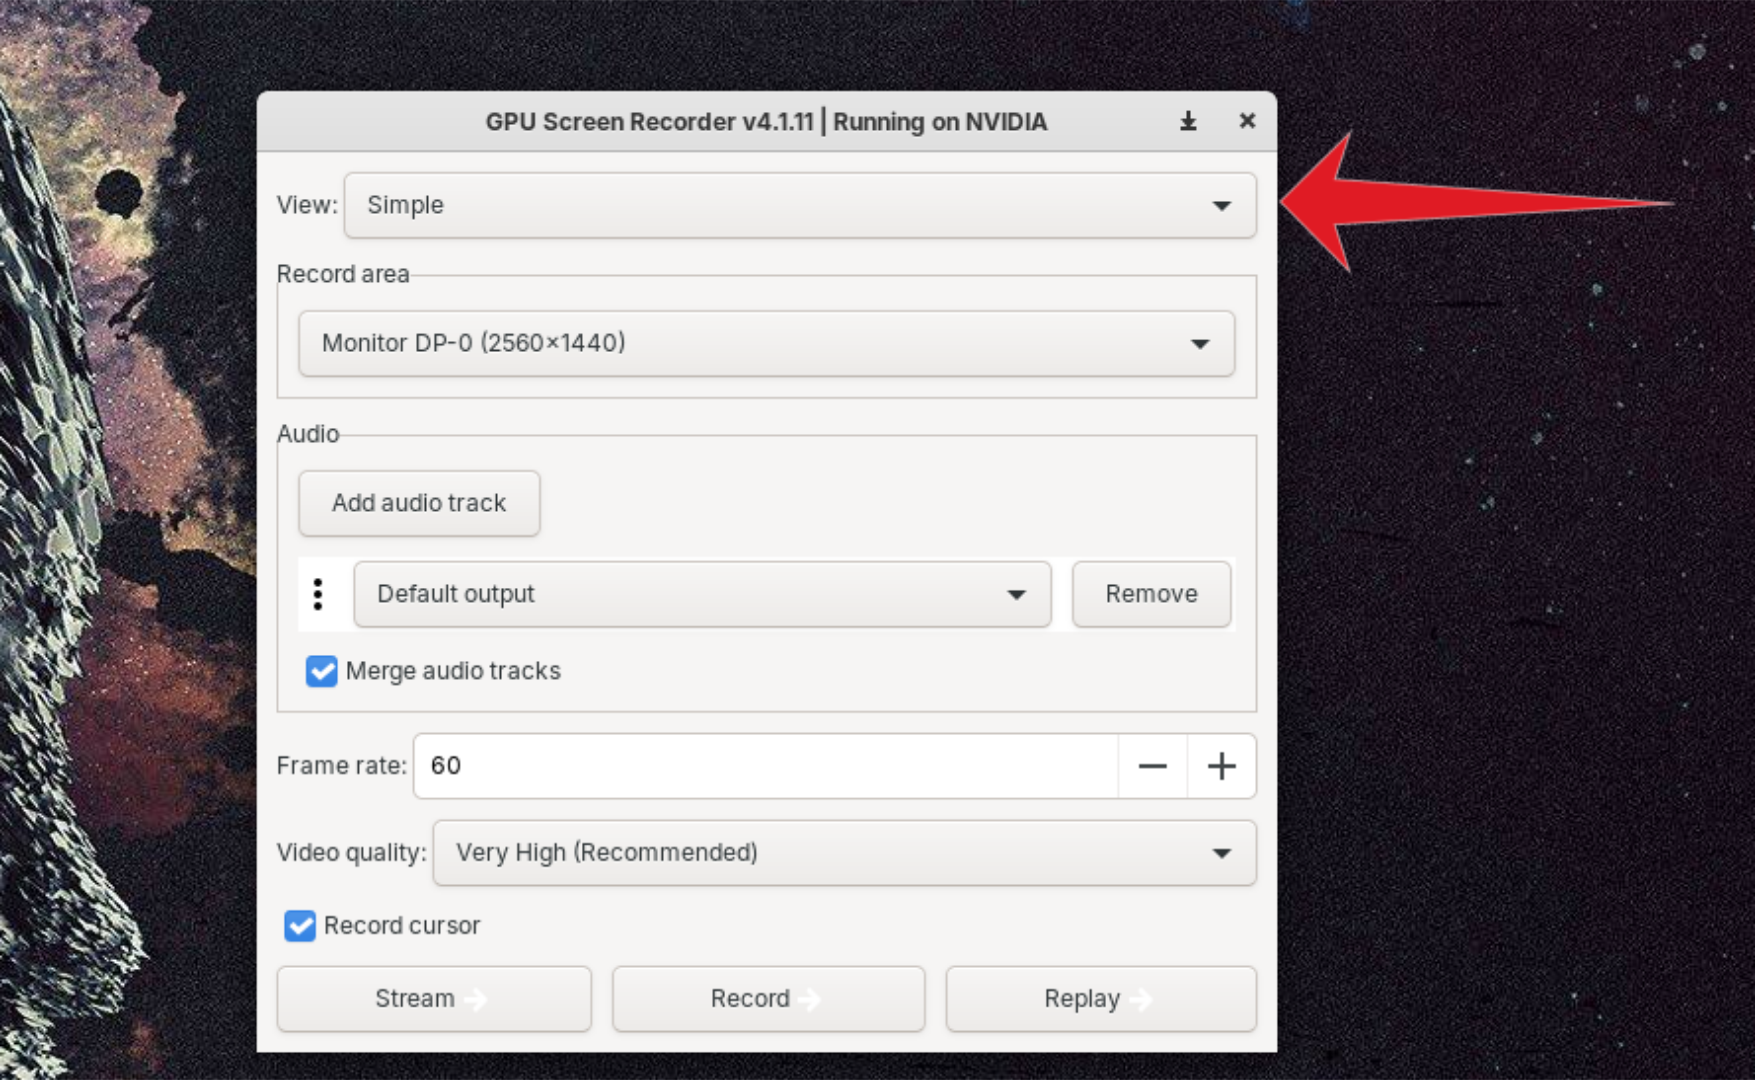
Next, head to the "Record area" and select your monitor. You can also choose options like "Window," "Follow focused window," "Desktop Portal," or "All monitors." Stick with your monitor for the best results.

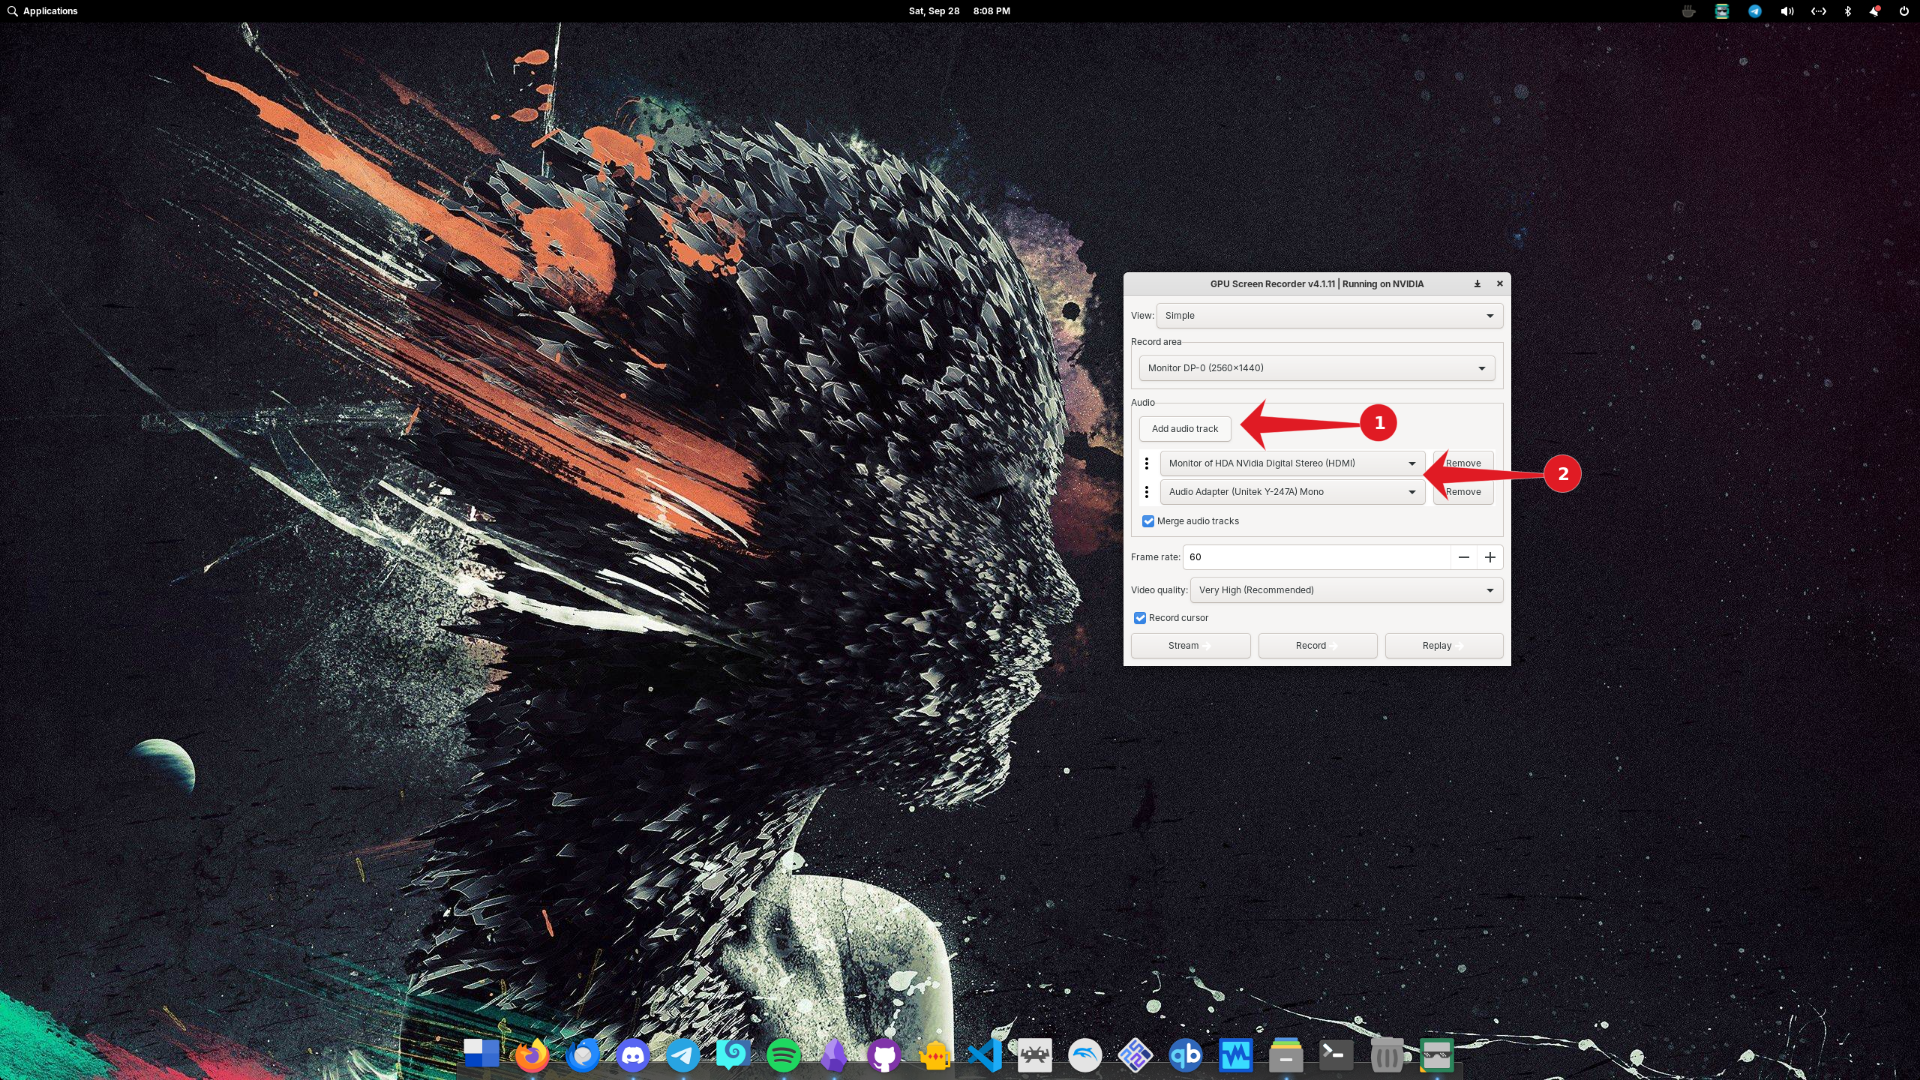
After that, move to the audio settings. By default, GPU Screen Recorder will record your computer's sound device. If you want to add an audio track (like a microphone), just hit "Add audio track" and pick your device.
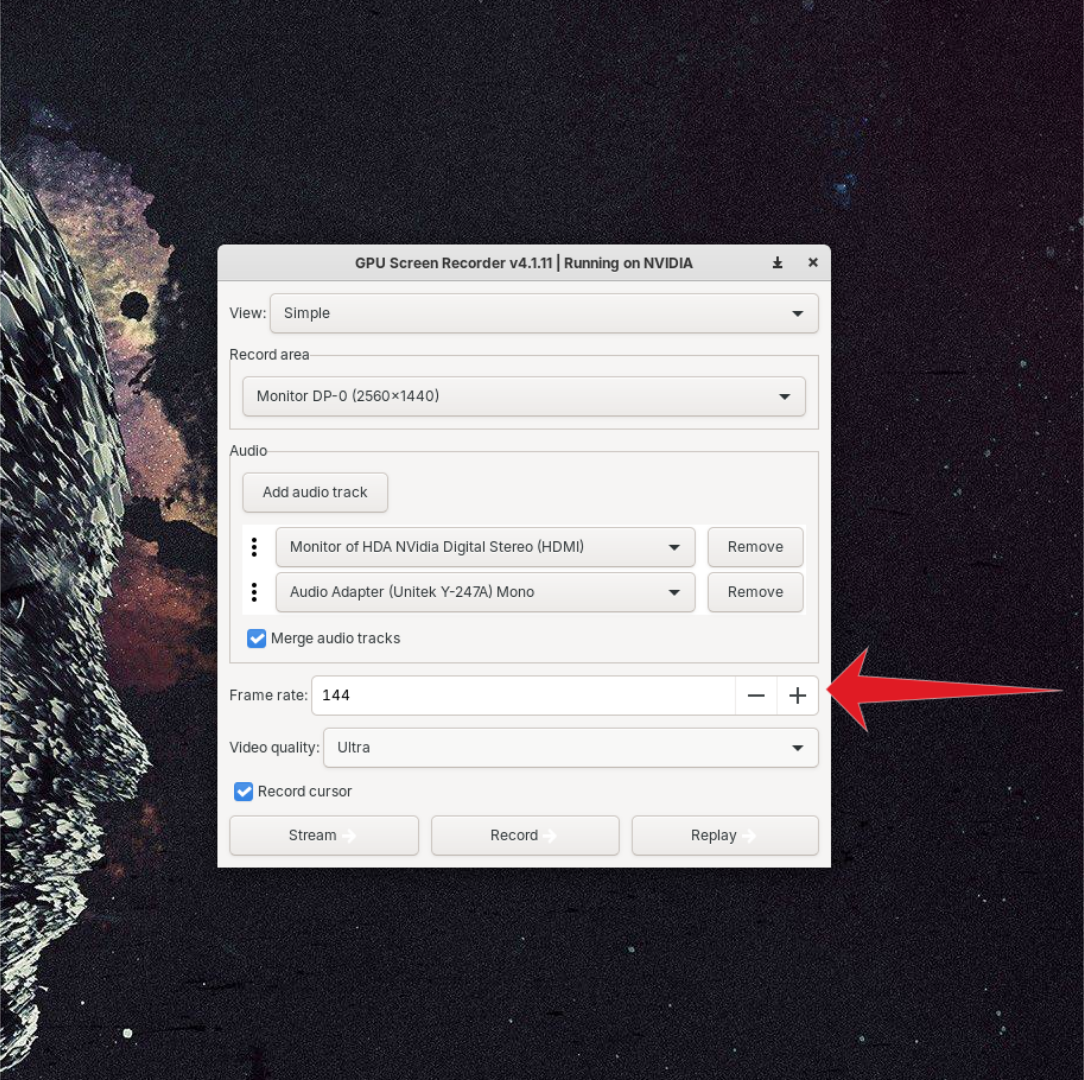
Now, onto frame rate. The default is 60 FPS, but you can tweak that up or down depending on your needs. Then, pick your video quality. "Very High (Recommended)" is a solid choice, but if you want even better quality, go with "Ultra."
Once everything is set up, hit the "Record" button to capture your gameplay. If you'd instead stream, click the "Stream" button. You can also use the "Replay" button to set up instant replays for your gameplay.
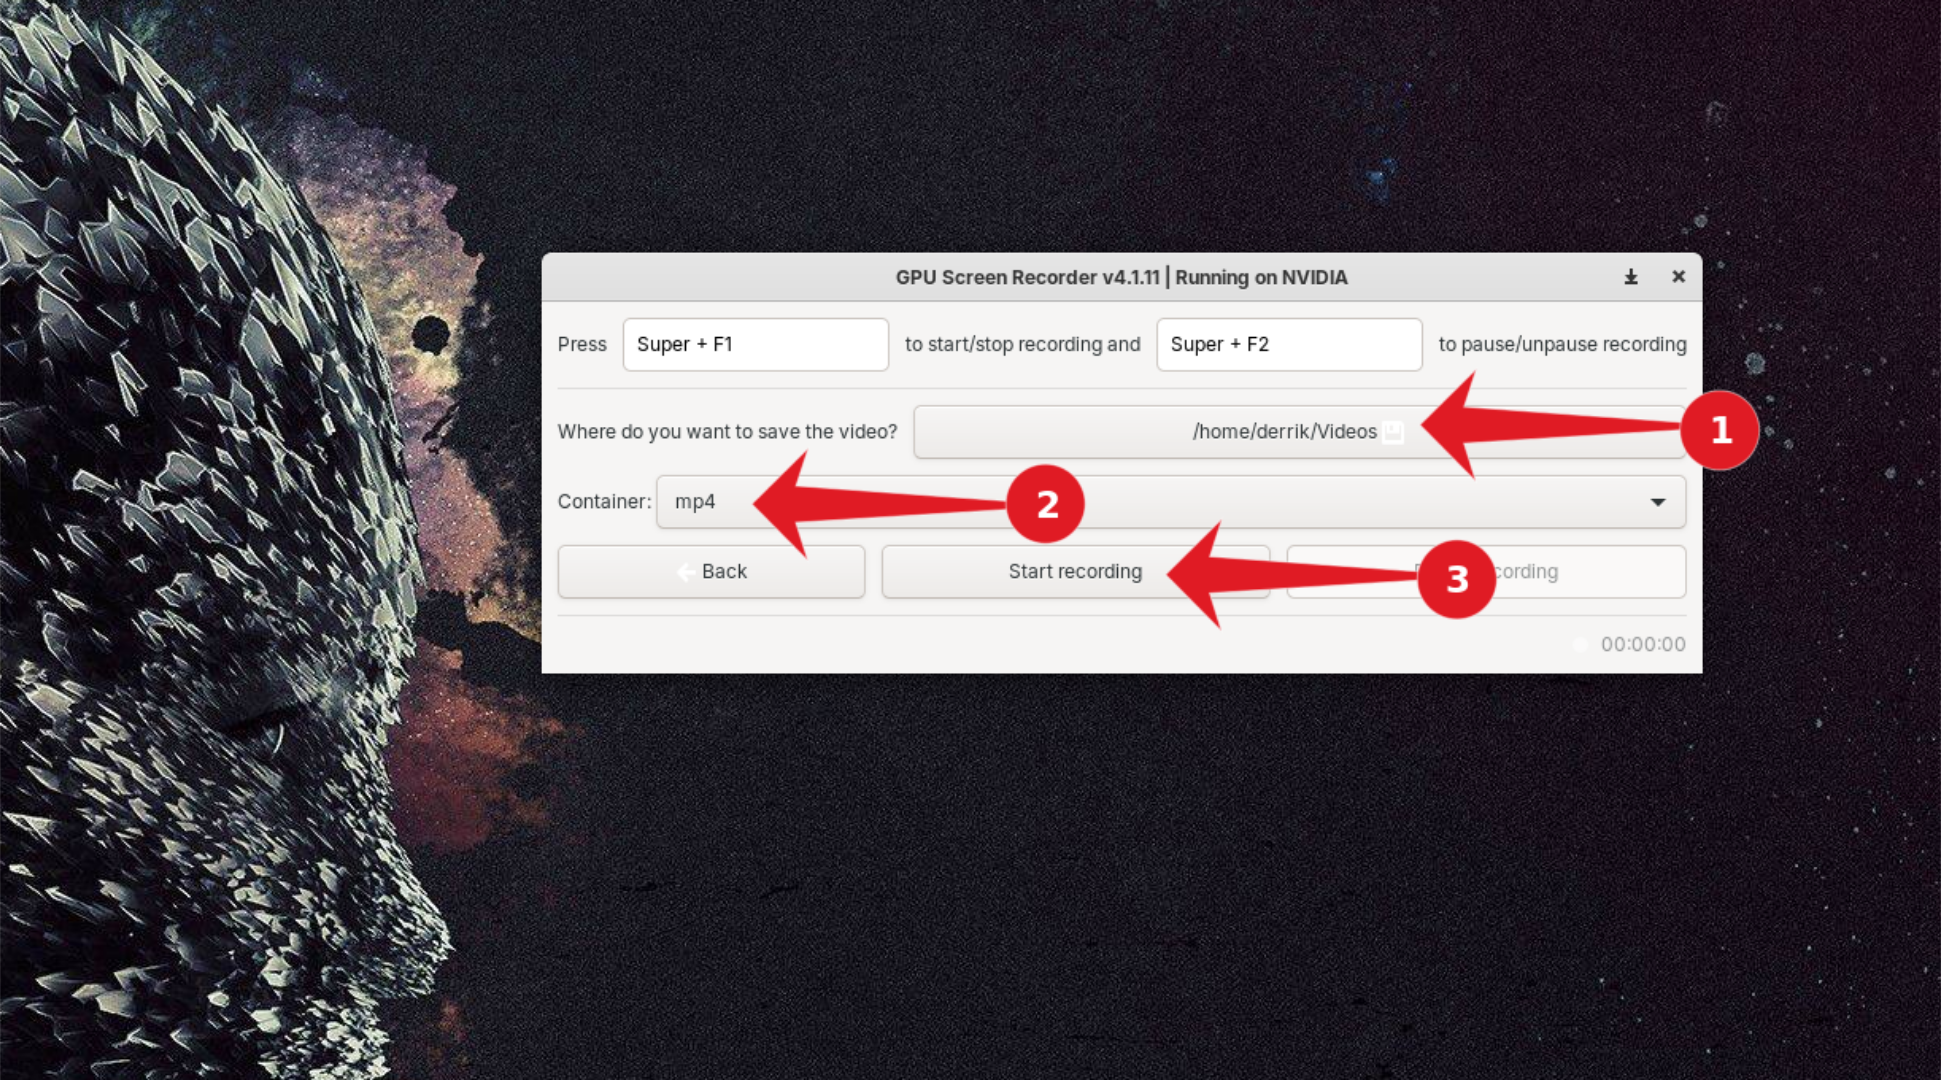
Press Super+F2 (which you might also recognize as Windows+F2) when you're ready to stop recording. Enjoy your gaming sessions!
When you subscribe to the blog, we will send you an e-mail when there are new updates on the site so you wouldn't miss them.
About the author
I Got A Virus and I Don't Know What To Do!
I Need Help!

Comments