Tech News
Python Programming for Beginners: Let's Build a Simple Quiz App
Python programming for beginners should be fun. As someone who likes random trivia and games, building a quiz app for a trivia night is a fun and exciting way to learn some cool concepts in Python. Let's see what it takes to make this app.
Getting Started With Python Programming for Beginners
Python is among the most used languages in the world, and it's an easy starting point for beginners. It's such an easy tool that we've already built a simple To-Do List in Python, complete with adding and removing elements. This project will be slightly more complicated, but we have the same starting steps.
If you haven't downloaded and set up your IDE, it's relatively simple. Most users run Python on Windows or Linux, but there's also a Mac version. If you're not sure if you have Python on your system, you can check the version at the command line. A version number will tell you if you have Python and which version of the language you have installed.
I'm using Python for Windows, and I've already provided details on how to set up Python with my IDE of choice (Visual Studio). For a refresher, these are the steps:
Install Python for your Operating System. Install your IDE (Visual Studio, in my case). Check the version to ensure that your Python is installed correctly. Start a new project.Now that we've completed the basic setup, we can move on to actually building the application!
Setting Up Our Custom Questions Structure
As this is a quiz app, we will need something to store our questions and answers. For that, we'll set up a custom question structure in this format:
"question": <insert question here>,"options": [<comma-separated list of strings>],
"correct_answer": <string from the list that corresponds to the right answer>
To that end, we'll put together a test bed of five questions, from which we'll randomize the order in which they appear:
# Quiz questionsquestions = [
{
"question": "What is the capital of France?",
"options": ["London", "Berlin", "Paris", "Madrid"],
"correct_answer": "Paris"
},
{
"question": "Which planet is known as the Red Planet?",
"options": ["Mars", "Venus", "Jupiter", "Saturn"],
"correct_answer": "Mars"
},
{
"question": "What is the chemical symbol for Potassium?",
"options": ["P", "Po", "K", "Li"],
"correct_answer": "K"
},
{
"question": "What year was Abraham Lincoln born?",
"options": ["1909", "1811", "1809", "1776"],
"correct_answer": "1809"
},
{
"question": "What is the geographical name for a rainforest?",
"options": ["Taiga", "Badlands", "Selvas", "Hardpan"],
"correct_answer": "Selvas"
}
]
This sort of structure is called a dictionary. Dictionaries in any programming language are collections of key-value pairs. You can find the value connected to a particular key by searching in the dictionary for that key.
We'll also need to import the random library, allowing us to shuffle the array of questions. To do this, we'll include this line at the top of our code:
import randomThe import keyword enables us to "bring in" any library we need. In this case, we'll import the random library, which contains helpful functions to randomize lists and arrays. Reusing code like this is one of the most potent parts of Python. If you need something, there's probably a library with the function you're looking for somewhere.
Displaying a Question and Getting a Response
Now that we've settled on the questions we will ask, we have to figure out how to show the user those questions and get an answer from them. For that, we'll define two functions:
#Function for displaying the questions to the screendef display_question(question):
print(question["question"])
for i, option in enumerate(question["options"], 1):
print(f"{i}. {option}")
#Function for getting user input
def get_user_answer():
while True:
try:
choice = int(input("Enter your answer (1-4): "))
if 1 <= choice <= 4:
return choice - 1
else:
print("Please enter a number between 1 and 4.")
except ValueError:
print("Invalid input. Please enter a number.")
Let's examine these functions individually and determine their purpose. The display_question() function will take the question, output it to the screen, and print the options and the number value for each. The get_user_answer() function will collect the user's response and compare it to the correct answer defined in the questions we set up earlier.
The get_user_answer function will also do some basic error-checking. If the user enters anything other than a number or the number is outside the bounds of the choices, we'll prompt them for the answer again.
Now that we have questions and a way to prompt answers, we need to randomize the questions and allow the player to answer each. For that, we'll design a function called run_quiz():
#Running the Quiz from start to enddef run_quiz():
score = 0
total_questions = len(questions)
random.shuffle(questions)
for question in questions:
display_question(question)
user_choice = get_user_answer()
if question["options"][user_choice] == question["correct_answer"]:
print("Correct!")
score += 1
else:
print(f"Sorry, that's incorrect. The correct answer is: {question['correct_answer']}")
print() # Add a blank line for readability
print(f"Quiz complete! You scored {score} out of {total_questions}.")
percentage = (score / total_questions) * 100
print(f"Your score: {percentage:.2f}%")
In this function, we've defined a score variable, which we'll use to determine the player's success at our quiz. Next, you'll notice the random.shuffle(questions) line that will change the order in which the program asks the user the questions. There will be a lot of overlap when we only have five questions like this. However, once you start including dozens of questions, the chances are there won't be any way to predict what order the questions will be asked.
The for loop goes through every question in our array, asking and waiting for an answer. If the player gets the question correct, their score increases. If they get it wrong, they're prompted with the correct answer, so they'll learn for next time. When we finish the quiz, the program prints the final score the user got correct as a percentage of the total number of questions.
Building the Game Loop
All games require a game loop. In this case, our main game loop will be our main() function:
#The Main Game Loopdef main():
while True:
print("Welcome to the Python Quiz Game!")
run_quiz()
play_again = input("Would you like to play again? (yes/no): ").lower()
if play_again != 'yes':
print("Thanks for playing! Goodbye!")
break
if __name__ == "__main__":
main()
This function will encapsulate our whole quiz and ask the player if they want to play again. If they don't, it'll exit the game. If they do, it'll reshuffle the questions and ask them again.
Putting It All Together
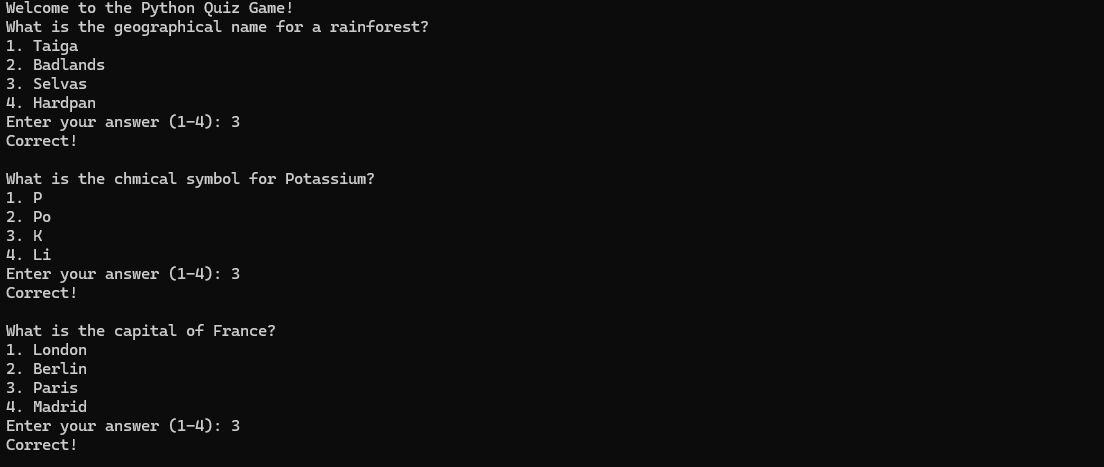
We can run the quiz once we've written and saved all our code. Visual Studio has a handy "Run" button that I use to start my quiz game. The results are impressive:
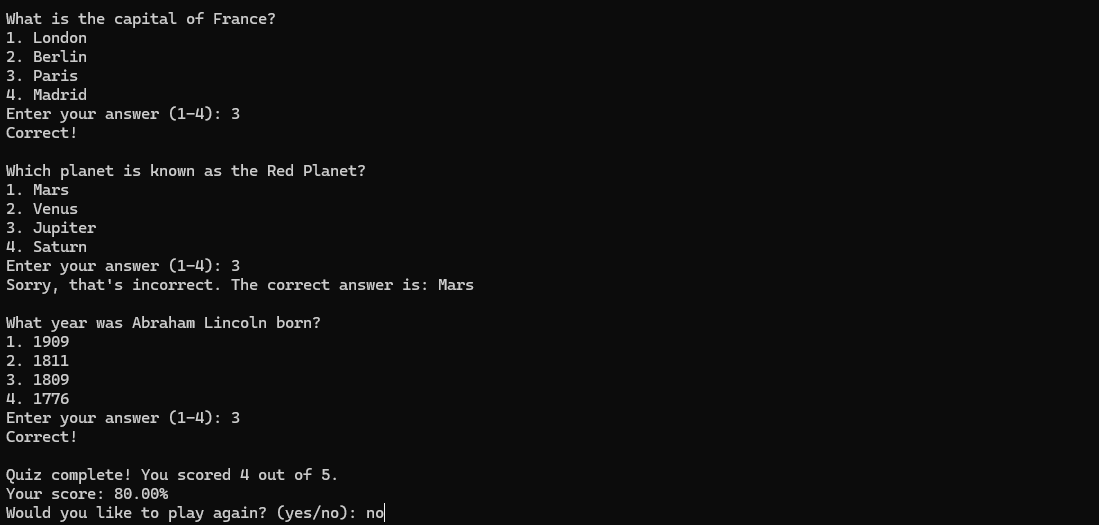
We even have corrections if the answer is wrong and a final calculation for the score:
Everything seems to be working as expected, so we don't have any bugs to fix. Congratulations on completing your very own Python Quiz Game project!
This is a straightforward quiz game; five questions aren't all that exciting. If you'd like to expand the project, here are a few challenges that you can try that aren't too complicated but will make this a more enjoyable experience for a player:
Increase the number of questions: The more questions you have, the more challenging the game will be for a player. Select a random subset of questions: Instead of asking all the questions all the time, select a subset of questions and ask those. This makes for more replayability since the player doesn't know what questions they'll get next time. Design a more user-friendly interface: The terminal is accessible for beginners to implement in Python programming, but putting together an actual UI is much easier than you'd think.Where to Go From Here
If you're looking for a more fully featured Python guide, you should check out apps and websites that help new developers. One of the best things about programming is that you don't need to follow anyone else's example. You can just learn as you go. Every single thing you learn can be put to use at some point in your career.
I've uploaded the full code for this quiz game to GitHub so you can cross-check it against your own.
When you subscribe to the blog, we will send you an e-mail when there are new updates on the site so you wouldn't miss them.
About the author
I Got A Virus and I Don't Know What To Do!
I Need Help!

Comments