Tech News
Not Receiving Gmail Notifications On Your Phone? Here's How to Fix It
Quick Links
The Gmail app on my last Android phone bugged me so much because it wouldn’t send me any email notifications whatsoever. I eventually had to figure out how to get notifications through some trial and error. If you’re having trouble with Gmail notifications on your Android phone, here’s how to quickly fix them.
Enable Notifications
Android has a dedicated notification menu in the Settings app where you can configure how you get notifications. If you’re not receiving notifications from any app, the feature itself might be disabled in the settings. Or you might have it disabled, particularly for the Gmail app. Let me show you how to enable them both.
Sometimes it’s worth toggling these settings on and off to fix the issue.
Enable Device Notifications
First, open the Settings app and search for “notifications.” You can also look for a menu labeled “Apps & Notifications” or “Notification Center.” The exact labels and layouts vary between manufacturers.
Tap “Lock Screen” and make sure “Hide Lock Screen Notifications” isn’t enabled. This setting applies to all apps, so make sure you choose “Show Notifications” here.
Enable App Notifications
Secondly, you want to make sure that notifications for Gmail are enabled. There are two ways to access those settings. Either press down on the Gmail app icon, tap “App Info,” and then “Notifications.” Or you can go to the notifications center in the Settings app.
The toggle next to “Allow Notifications” should be on, but you can configure the remaining settings to your liking.
Enable Account Notifications
You can also control the notification behavior for each email account logged into the Gmail app. If you’re not getting notifications for a specific email account, this could be why.
Open the Gmail app, tap the hamburger menu on the left, and select “Settings.” Pick an email from the list and scroll down to the “Notifications” section.
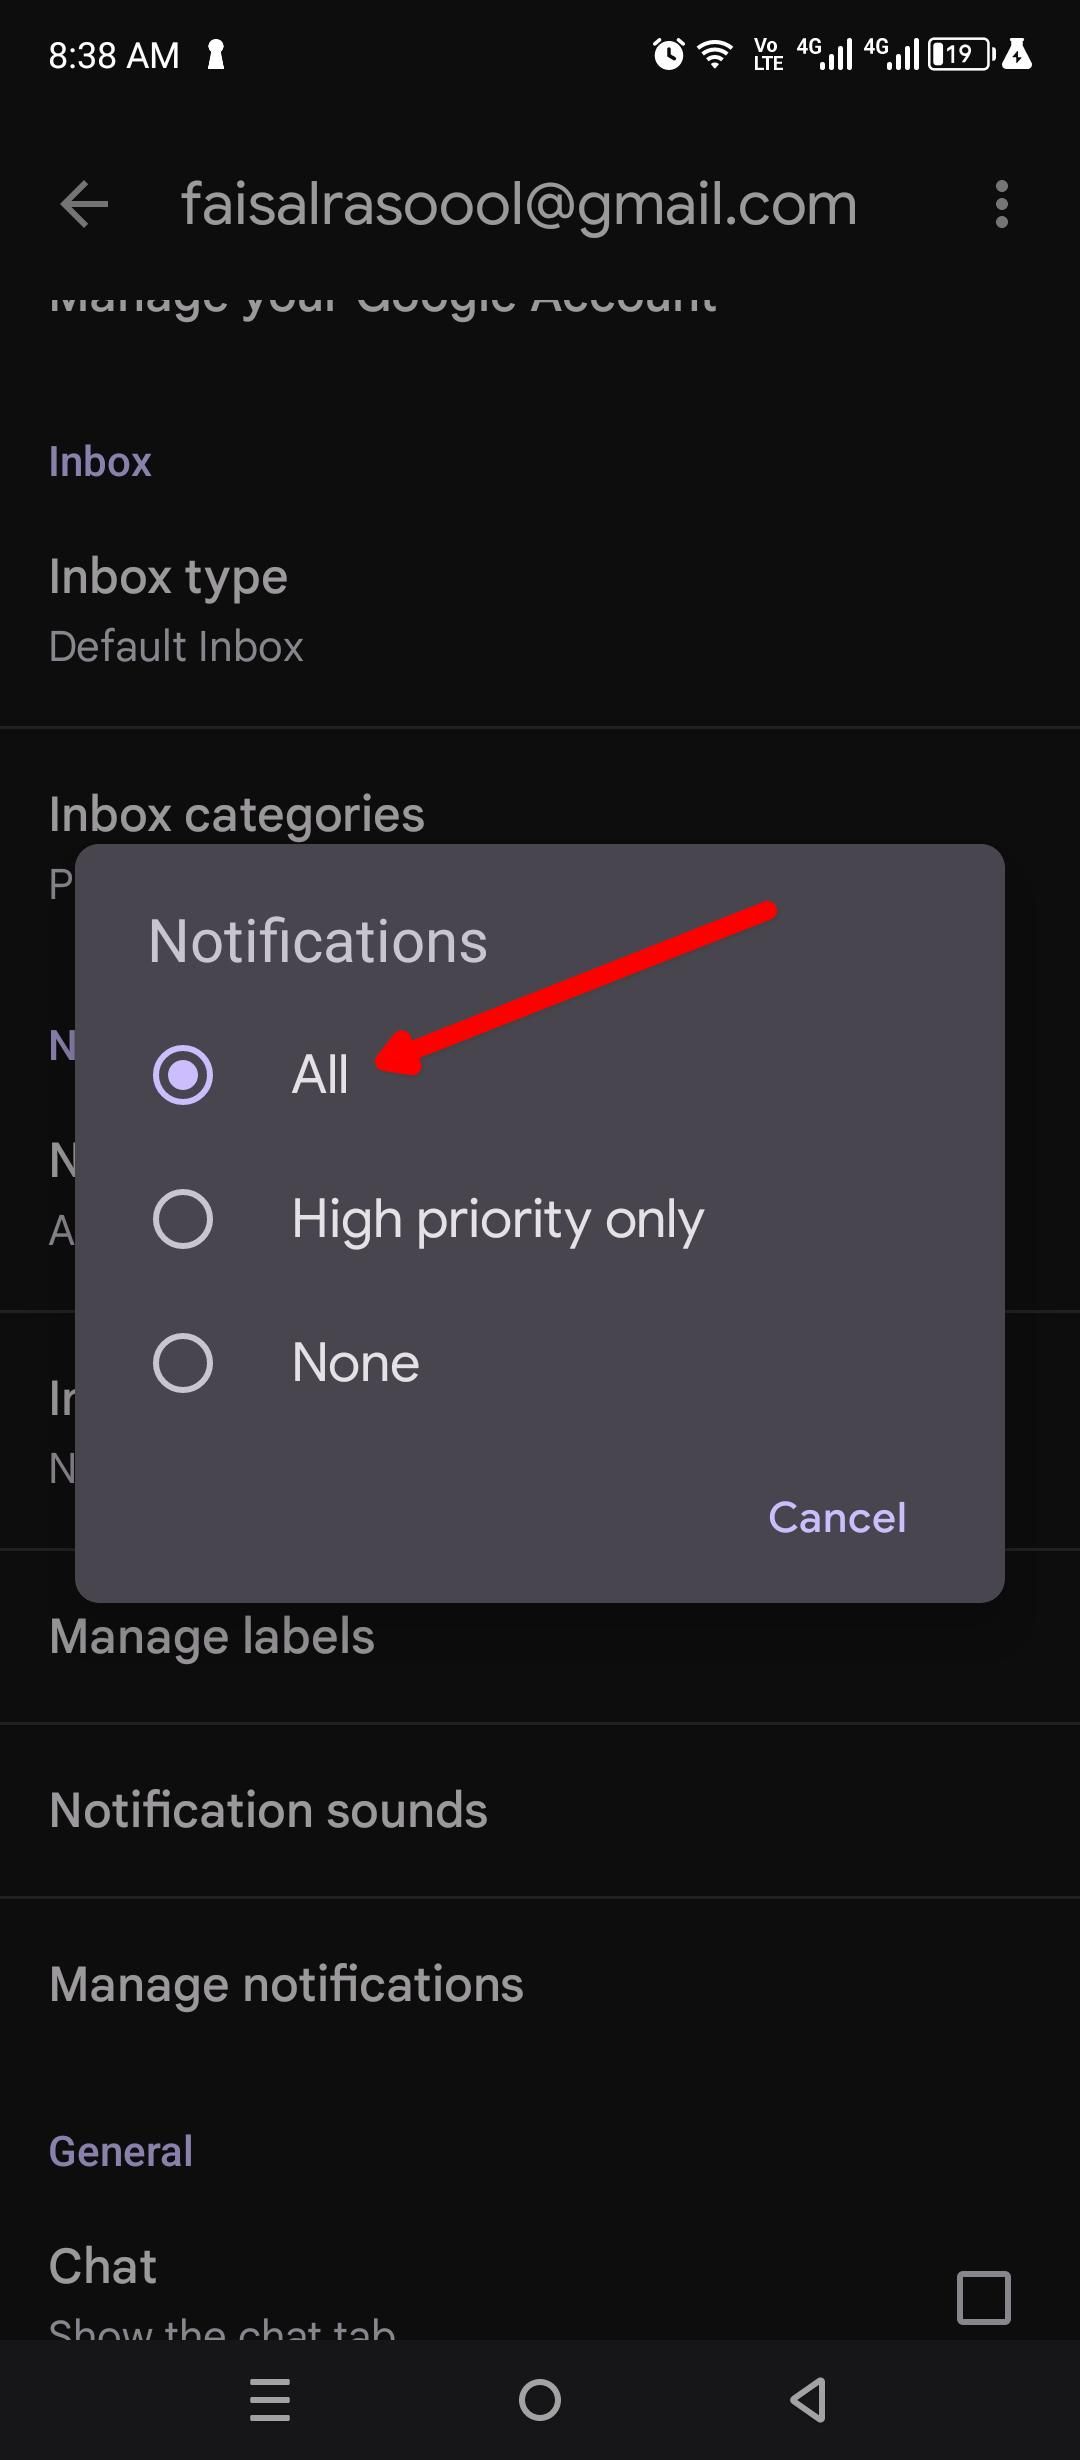
Under “Notifications,” you want to check if “All” notifications are enabled. If it’s set to “High Priority” or “None” you’ll be missing alerts.
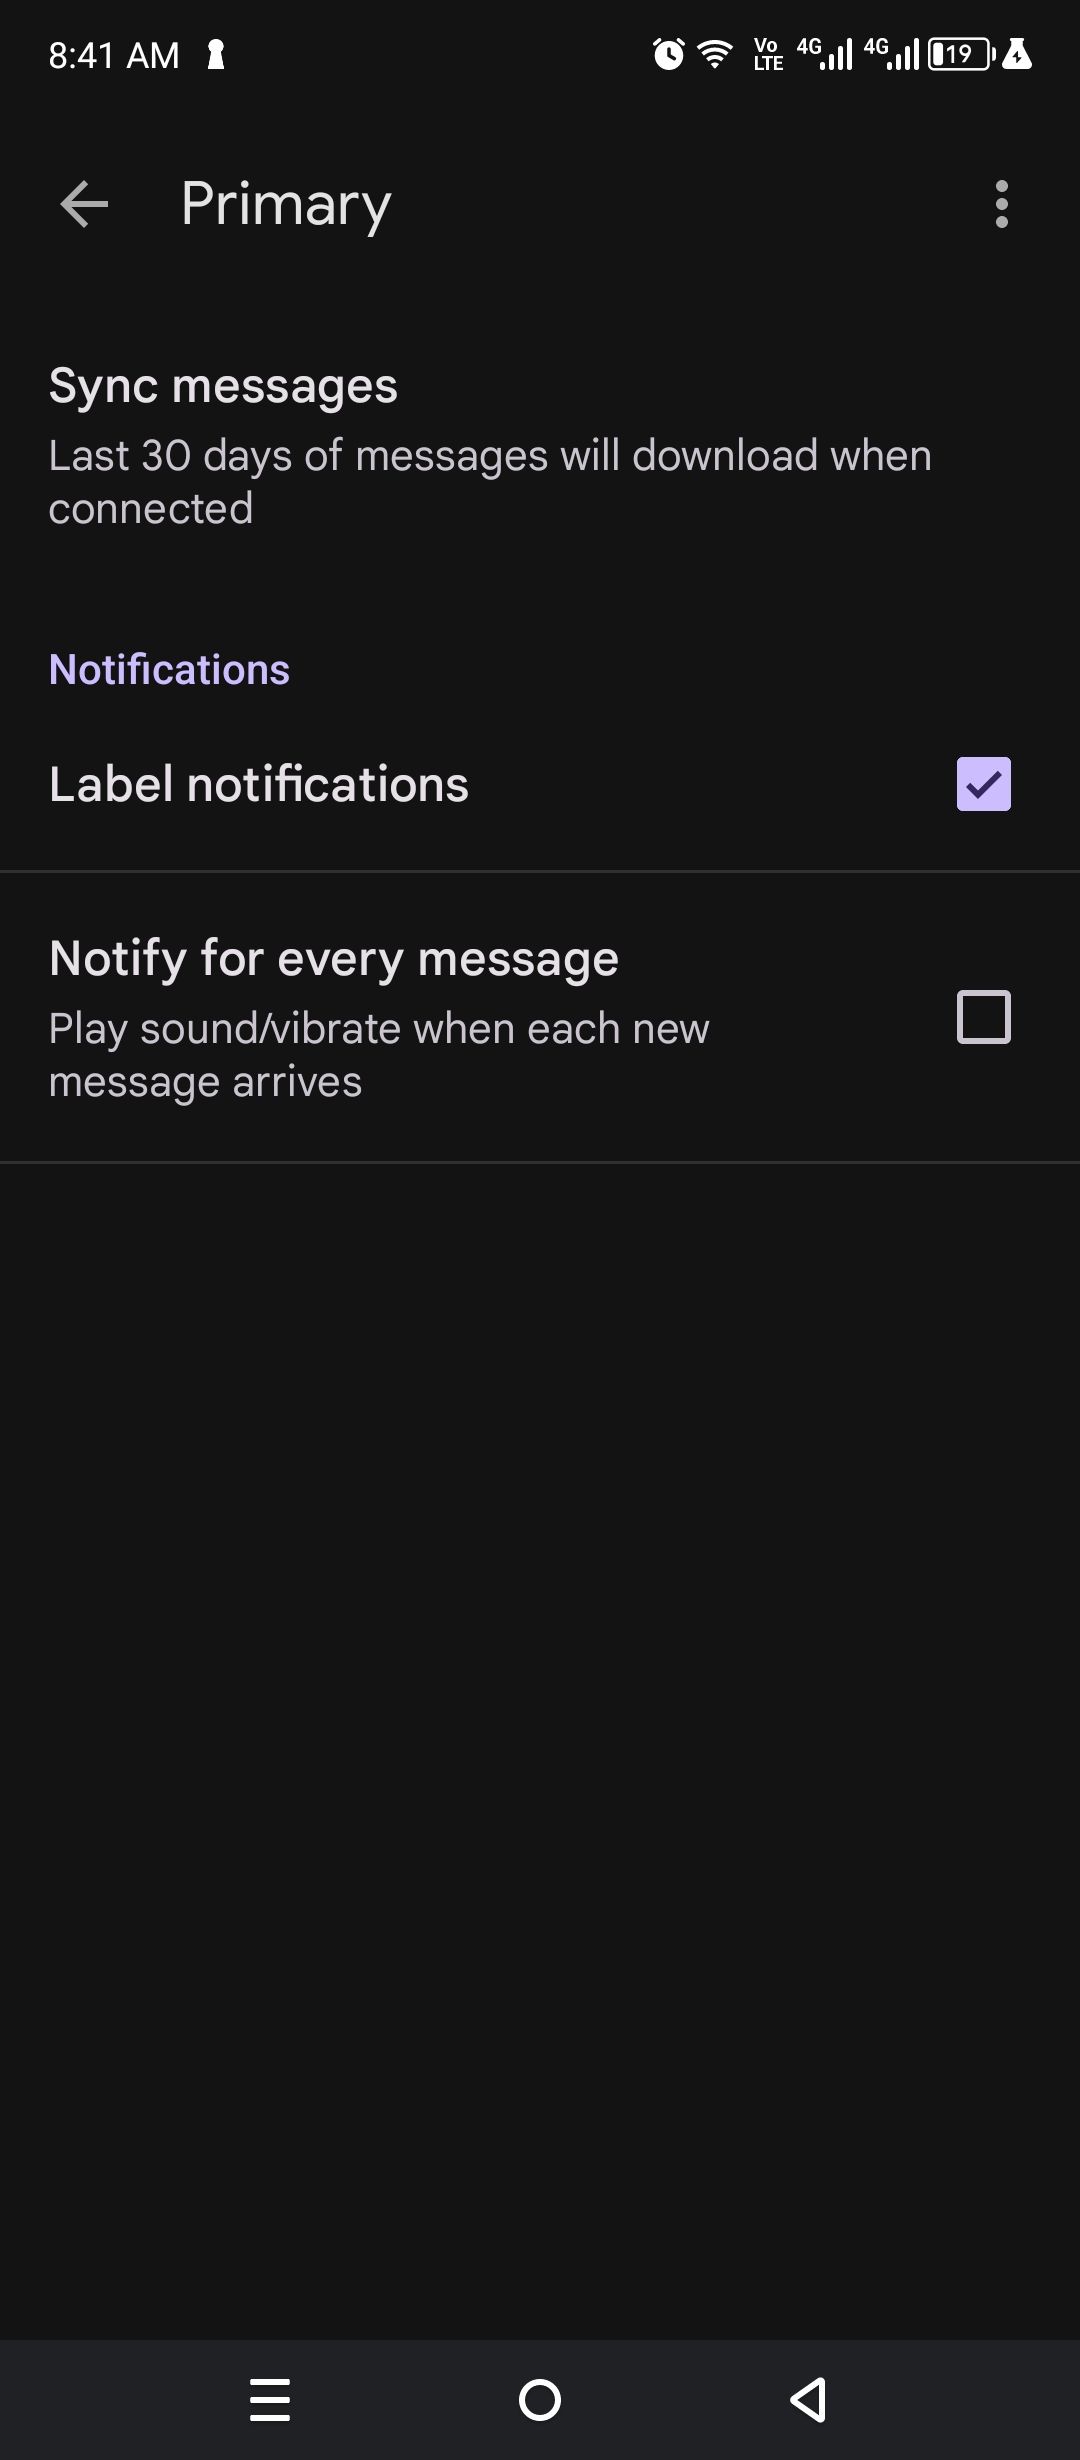
Also, tap “Manage Labels” and make sure that “Label Notifications” for each inbox section are enabled.
Disable Do Not Disturb Mode
The Do Not Disturb mode blocks all notifications from getting through. If you often keep Do Not Disturb mode active, set it up to allow certain Gmail notifications if you don’t want to miss any important alerts.
You can usually find the Do Not Disturb toggle by pulling down the control center from the top of the screen. Alternatively, you can go to Sound & Vibration in the Settings app and find Do Not Disturb there. And make sure it’s not enabled.
If you do want to keep Do Not Disturb active but don’t want to miss Gmail notifications, you can move Gmail to the allowlist. Under the “Who Can Interrupt Do Not Disturb” section, tap “Apps” and “Add Apps.”
Pick Gmail from the list and select which type of notification can interrupt the Do Not Disturb mode. You can also allow all notifications.
Enable Sync
If your notifications are set up just fine, the other common culprit is the sync feature in Gmail. Sometimes, just turning it on and off is enough to restore all notification behavior.
Open the Gmail app. Navigate to Settings and select the email account that’s not sending you notifications. Scroll down all the way to the Data Usage section and enable “Sync Gmail.”
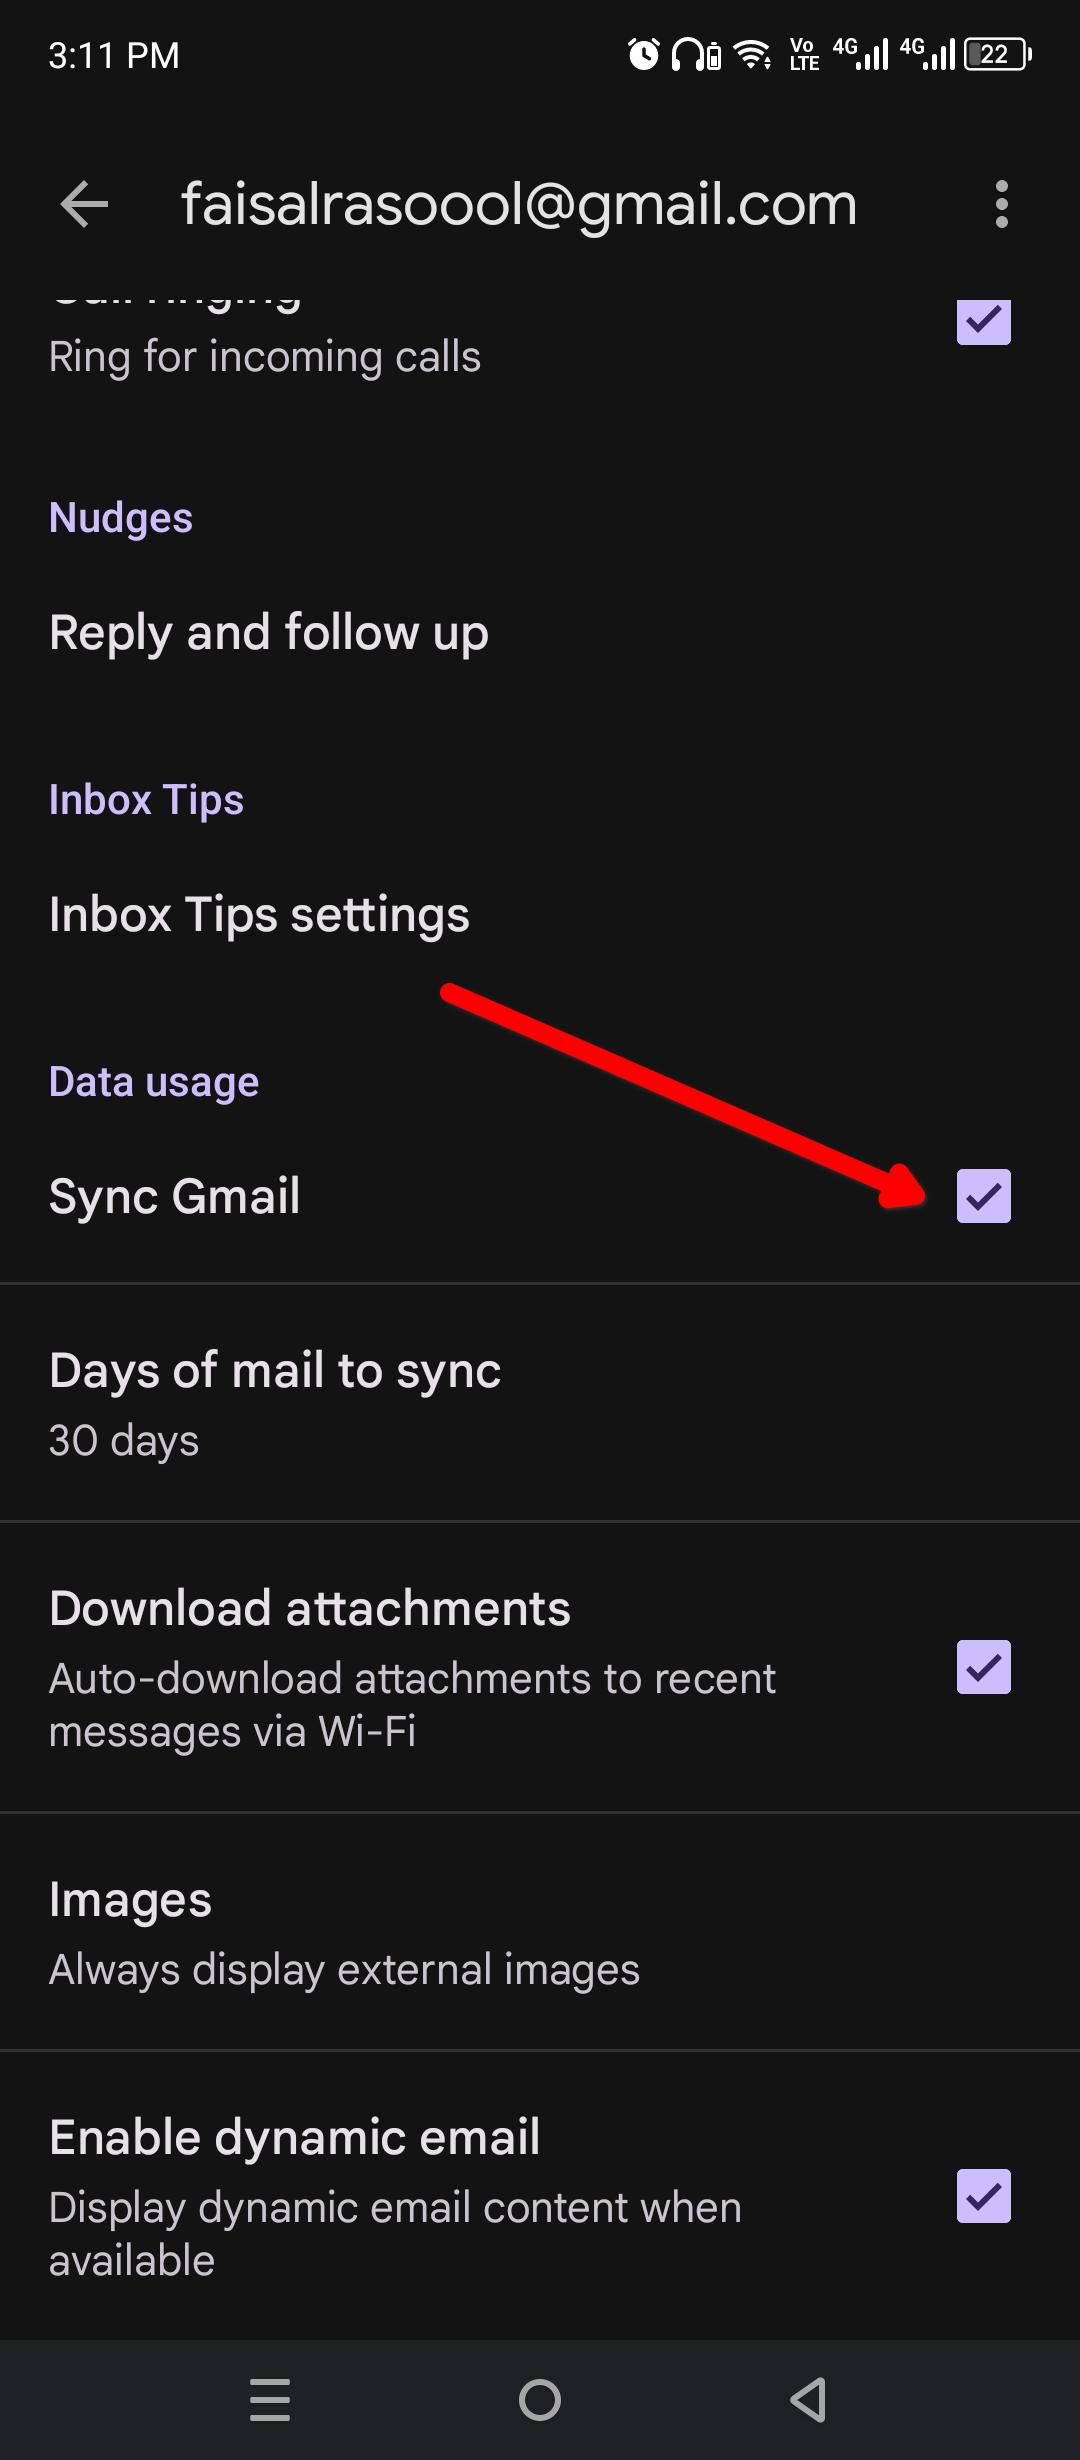
Even if it’s already enabled, it might be glitching, so just disable and re-enable it for good measure.
Disable Battery Optimization
The battery optimization feature in Android is by far the worst offender when it comes to messing with notification behavior. It can randomly kill background processes that an app needs to be active in order to push notifications. To prevent that, we need to exclude Gmail from the list of apps fed to the battery optimization feature.
You can access the list of battery-optimized apps in the Settings app. The navigation layout and labels will vary between manufacturers. So try looking for menus labeled “power saving”, “battery saver,” or “battery optimization.” These settings are usually pooled in the Power & Battery section. Alternatively, you can just look up “optimization” or “battery saver” in the Settings search bar.
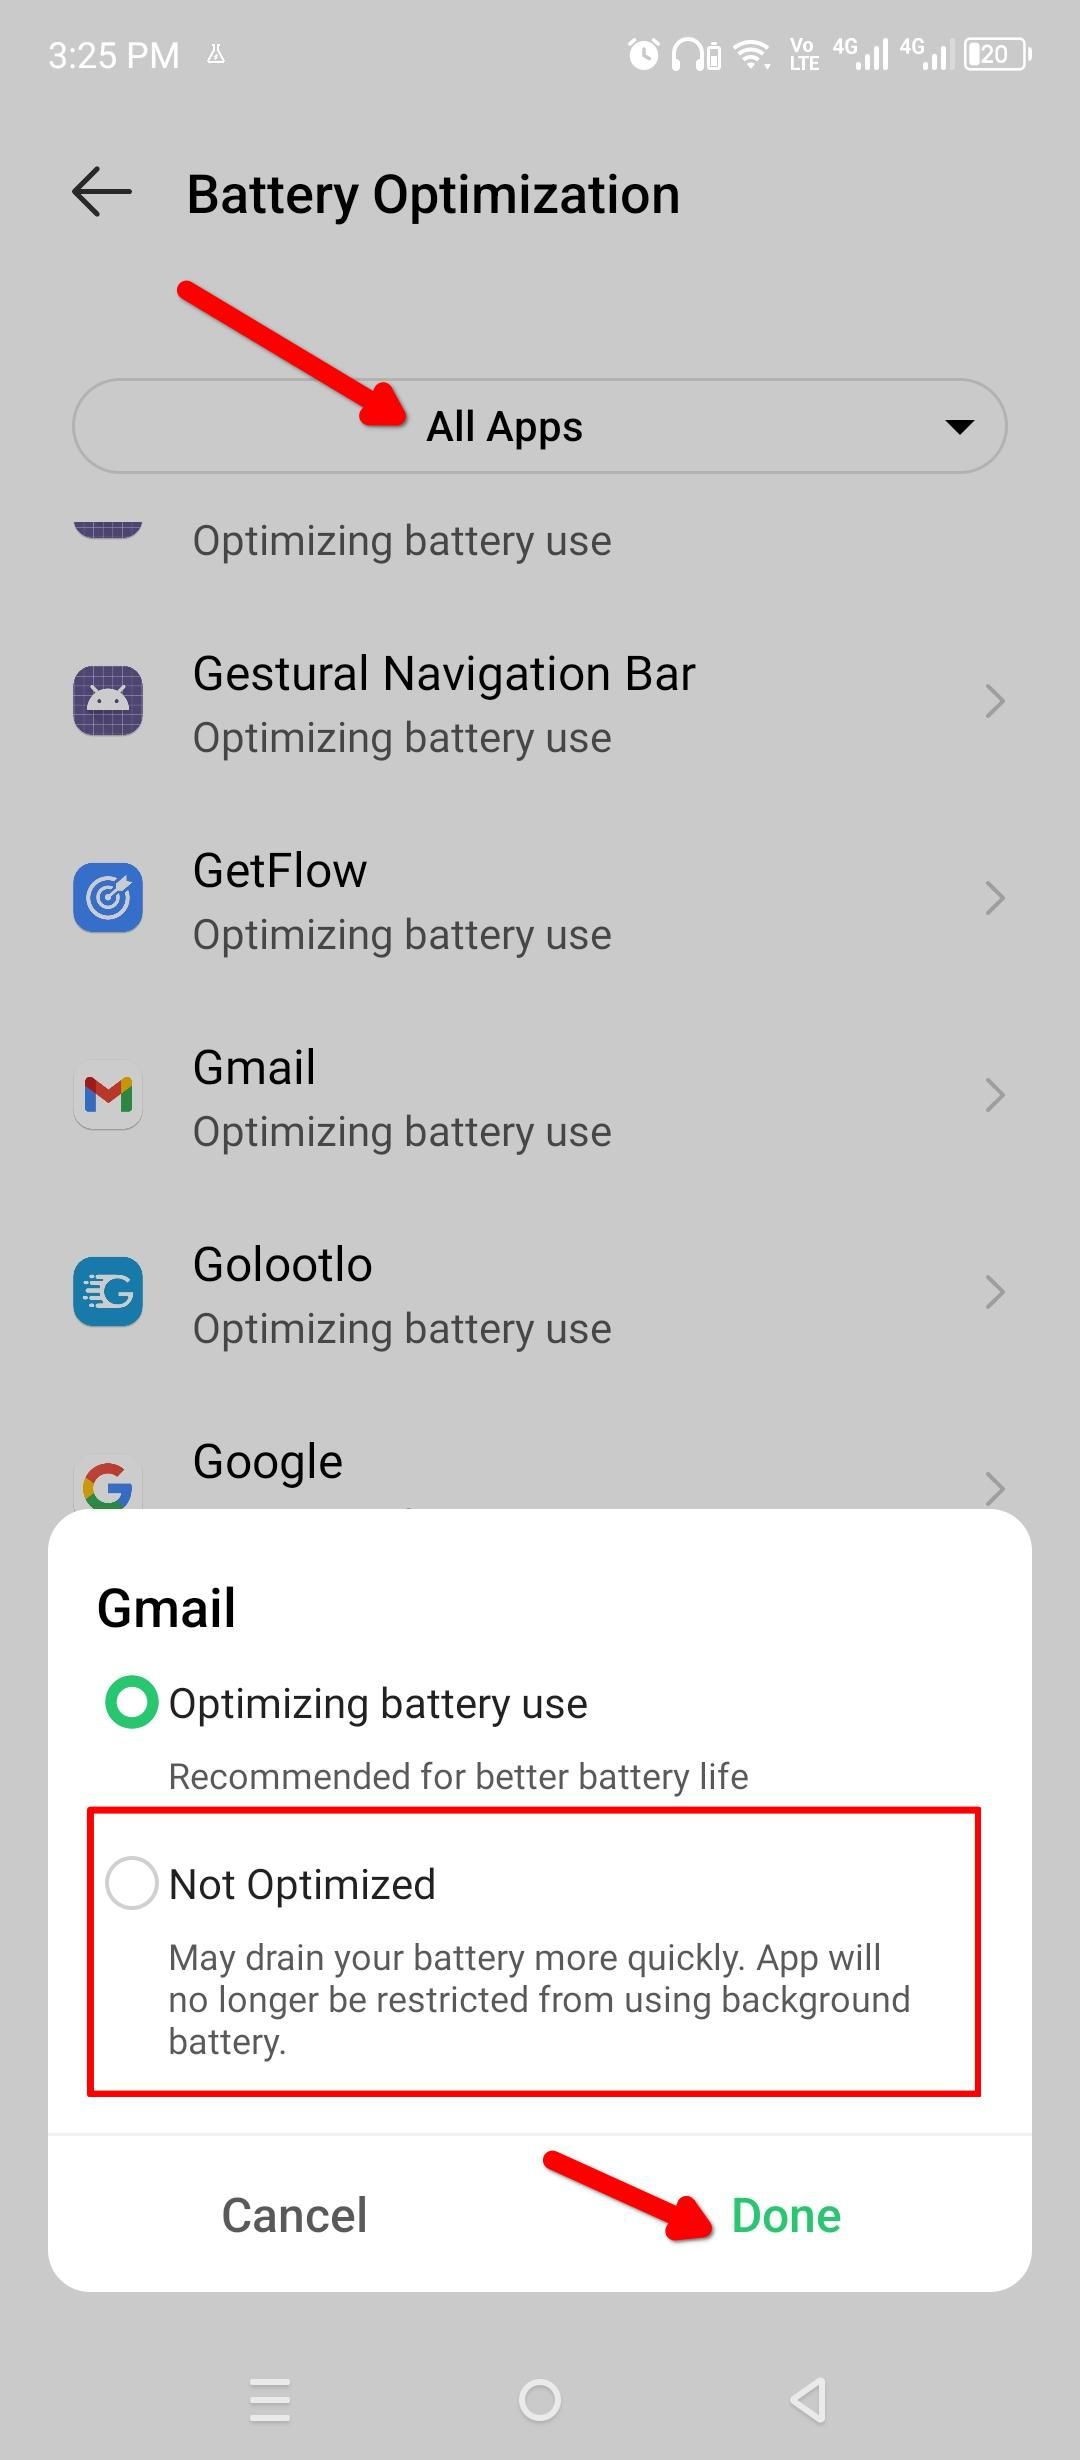
It should give you a list of every app on your device. You can sort it by “Not Optimized” and “All Apps.” Make sure you’ve selected “All Apps” and look for “Gmail” in the list. Tap the app icon, and pick “Not Optimized” or “Don’t Optimize” to stop the restrictions.
Alternatively, you can open the app drawer, long-press the Gmail icon, and select “App Info.” There should be a battery menu here. Tap it and allow battery usage in the background without any restrictions. Reboot your phone and you should start getting notifications.
Some of these solutions should work for any app, not just Gmail. If none of them work, you might be running an old Android device which is no longer supported.
When you subscribe to the blog, we will send you an e-mail when there are new updates on the site so you wouldn't miss them.
About the author
I Got A Virus and I Don't Know What To Do!
I Need Help!

Comments