Tech News
If Youre Not Using This OneNote Feature, Youre Missing Out
If you’ve got a Microsoft 365 subscription, and you’re still handwriting lecture notes or typing out meeting minutes, you’re not making the most of it! OneNote’s record and transcribe feature can save you all that time and effort. Here’s how you can start using it.
How to Record and Transcribe in OneNote
Recording and transcribing audio in OneNote is super easy and can save you tons of time. Here’s how to get started:
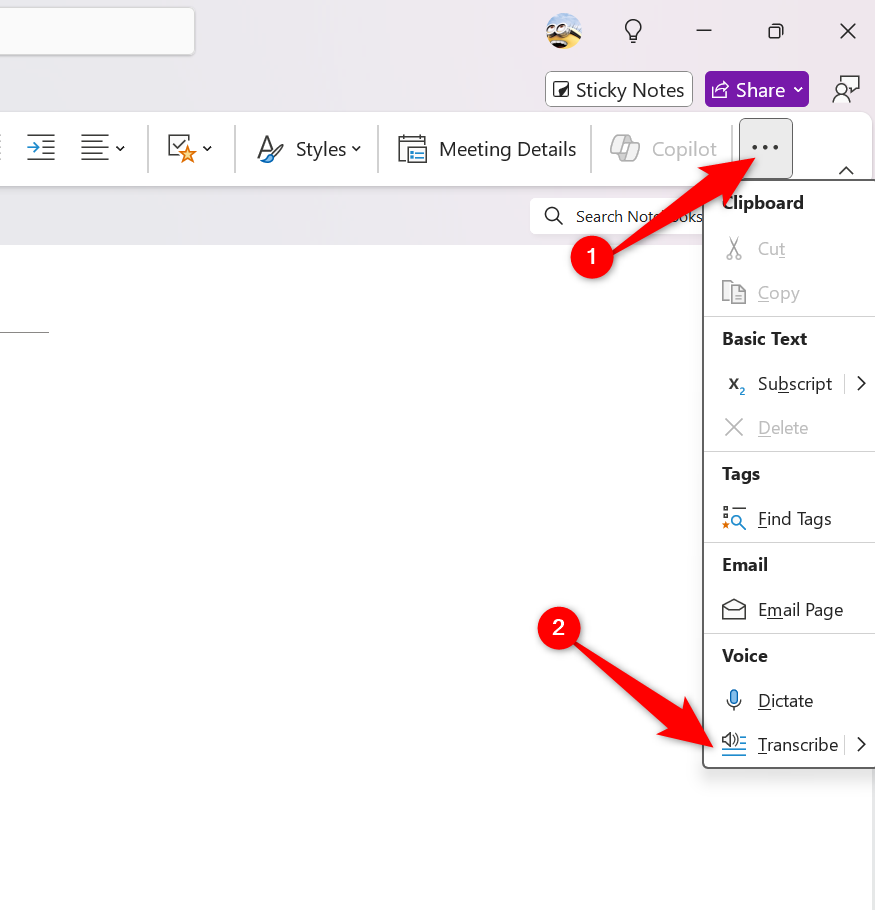
First, open a notebook in OneNote and add a new page. From the "Home" tab, click on the "More Options" icon (it looks like three dots or an ellipsis). This will show you additional options. Click "Transcribe" from the dropdown.
A side panel will pop up on the right, giving you two ways to transcribe. If you already have a pre-recorded audio file, hit "Upload Audio," and it will bring up your file explorer so you can select your file.
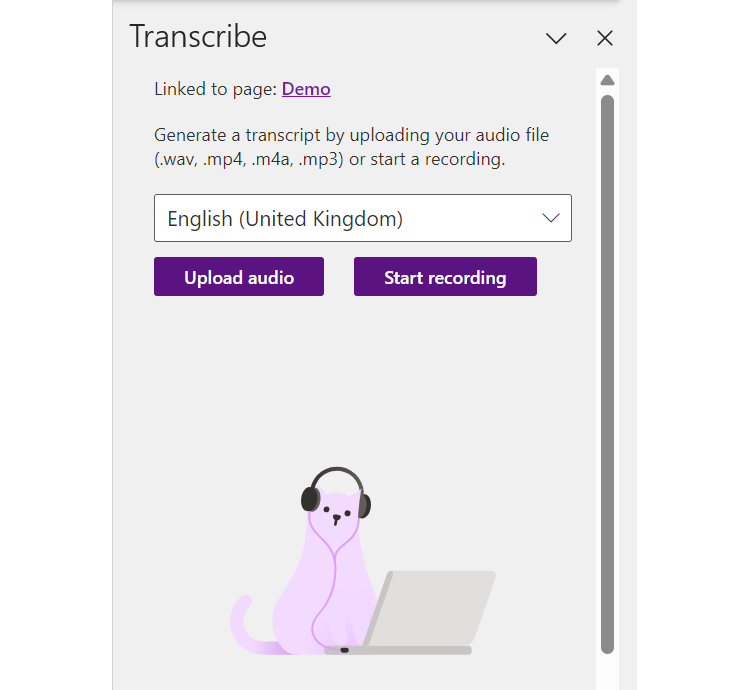
If you don’t have a recording yet and want to capture live audio, click "Start Recording." OneNote will immediately start recording from your computer’s mic. You can pause and resume the recording whenever you want by clicking the microphone button. The recording will also keep running in the background, so you can switch apps and continue using your PC like normal while it's ongoing.
Once you're happy with the audio you’ve captured, click "Save and Transcribe Now."

OneNote will upload the file to OneDrive, process it, and return a transcription. The speed of the transcription depends on how large your audio file is. I've tested it with a 15-minute audio file, and it returned the transcripts in around 3 minutes, although your internet connection is definitely a factor.
There aren't any limits on audio length right now, but Microsoft did include a notice that it may add some in the future, so take advantage of it while you can!
Your transcription is linked to the page where it was created, so don't worry about losing it even if you accidentally close the transcription pane. However, it also means that you can only have one transcript per page. If you need to transcribe something else, you’ll need to do it on a new page. I’ve found that sometimes you’ll need to close and reopen the transcription pane before it gives you the option to start a new transcript on a new page.
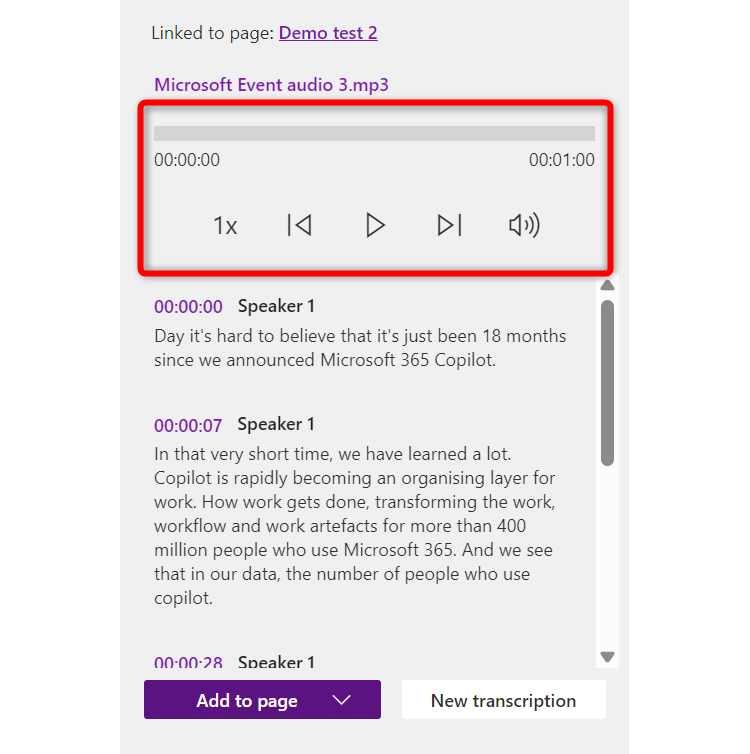
Above the transcript, you’ll find a playback menu that lets you listen to your audio recording. What’s cool about this is that OneNote captures any drawings you make on the page while recording. So, when you play back the audio, your ink strokes will appear too, perfectly matched with the audio. It's a great way to capture notes and visuals while keeping everything in sync.
Editing Your Transcript
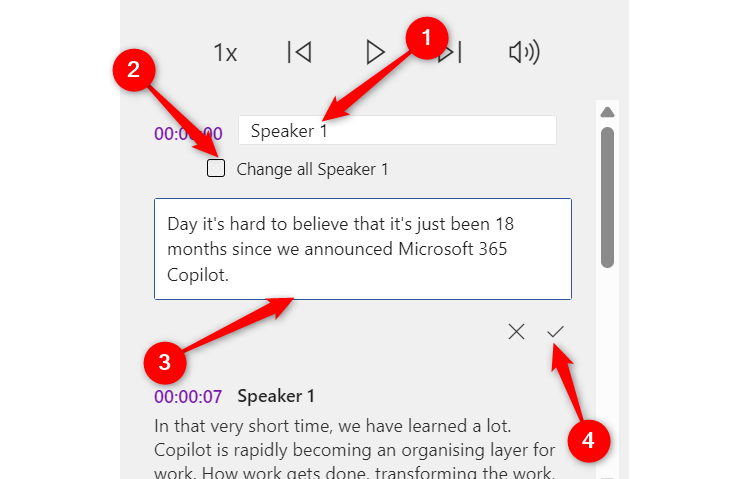
Once you have your transcript, you can easily make edits to fix any mistakes. Just hover your pointer over the part of the transcript you want to edit and click the pencil icon.
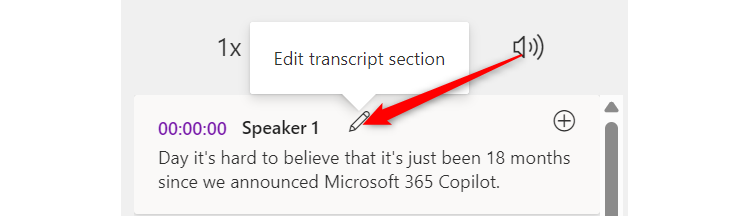
From here, you can make changes to the text or even rename the speakers. If you choose to rename a speaker, you can apply that change to the entire transcript by ticking the “Change All Speaker” box. Once you're done, hit the check mark to save your changes.
After you're happy with your transcript, the final step is adding it to your page. You can either add your transcripts section by section or all at once.
To do it by section, hover your pointer over the transcript you want to add and click the click plus button.

If you choose to add it all at once, you’ve got four options on what to add to the page:
Just text Text with speakers Text with timestamps Speakers and timestampsPick whichever format works best for you, and you're good to go!
Tips for Getting the Best Audio Recordings and Transcripts
Getting an accurate transcript is dependent on capturing a quality audio recording. There are a few things you can do to get the best-sounding recording possible.
Firstly, review your audio input. Make sure you’re using the right microphone, and test it to make sure it's working fine.
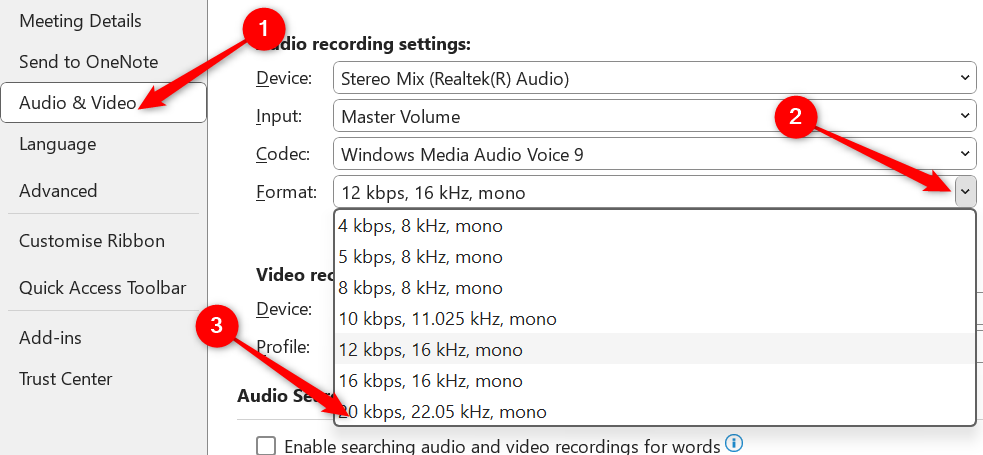
Next, check that you're recording with the best sound quality. Click on "File" and select "Options." Navigate to “Audio And Video,” click on “Format” and choose the highest value in the drop-down menu. This will improve the quality of your voice recordings, but note that it will also increase the size of your audio files.
Finally, if you plan to use this feature heavily, invest in a good sound recorder. While you can record with your computer’s built-in microphone, it won’t do a good job of isolating your voice and removing ambient noise. Additionally, external sounds like the clacking of keys on your keyboard can interfere with your recording. A voice recorder like the Sony Mono Digital Voice Recorder could solve this problem for you.
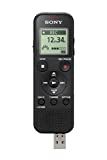
Sony Mono Digital Voice Recorder
$45 $60 Save $15
Sony's digital voice recorder promises up to 57 hours of battery life and has a USB connection so you can transfer your recordings to a computer.
Limitations of OneNote’s Recording Feature and Workarounds
By default, recording on OneNote is limited to gathering audio from your computer's microphone. That means that if you're trying to transcribe a Zoom call, you can't use a headset, and you have to put your volume on full blast to give your mic the best chance of picking up the sound.
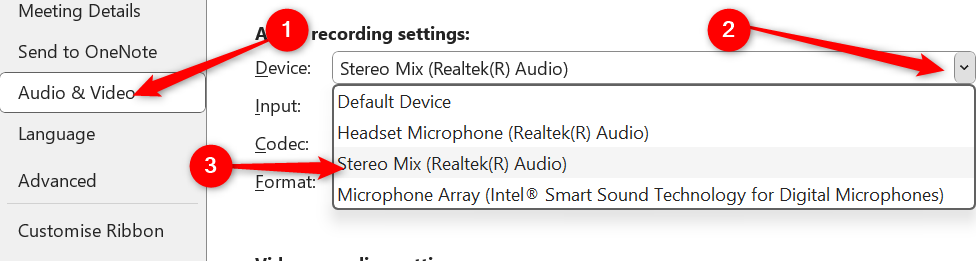
Fortunately, there's a way around this problem. You can enable stereo mix and then change the audio input settings of OneNote so that it captures the sounds coming from your computer. To do this, head back to the Audio and Video settings and click “Devices.” Choose “Studio Mix” from the drop-down, and press “OK” to finalize your changes.
If that doesn't work, don't worry, you can still try these methods for recording the sound coming from your PC and then upload it for transcription.
OneNote’s record and transcription feature is a game changer that will save you hours of tedious work. You can make things even easier by using AI to organize those notes. And it doesn’t stop there. OneNote can boost your productivity by letting you cut down on other apps and keep everything organized in one place.
When you subscribe to the blog, we will send you an e-mail when there are new updates on the site so you wouldn't miss them.
About the author
I Got A Virus and I Don't Know What To Do!
I Need Help!

Comments