Tech News
How to Turn Your Notes Into a Formatted Document in Microsoft Word

We use Word when we're brainstorming or want to ensure that our ideas don't get lost. Here are some best practices for converting random information into a more easily manageable document.
Removing Redundant or Duplicated Notes
You're tasked with taking notes at a meeting, and you decide to use Word to capture your notes and thoughts about the meeting; the only problem is that the document you're left with is a little bit messy and in need of organization.
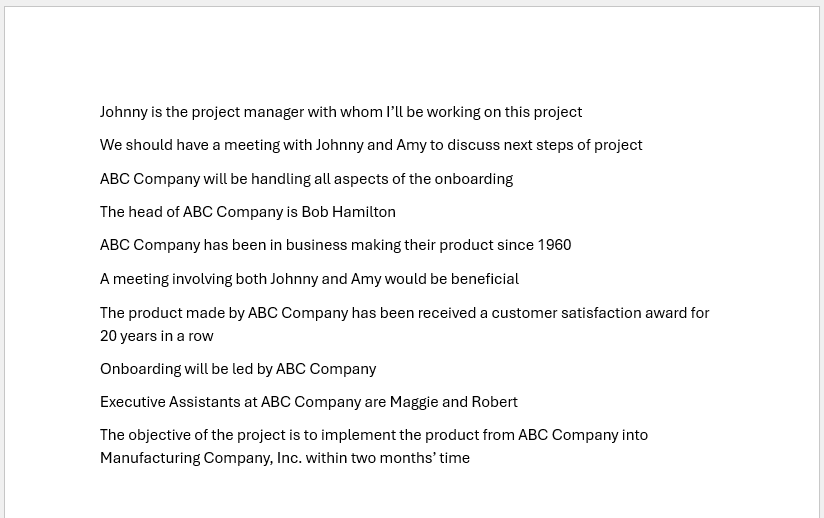
The first thing to be done is to organize the line items. Before we do that, we have to go about removing the redundant and duplicated notes. The easiest and quickest way to seek out and identify the repeated line items is to search for repeated words that may be contained in the lines (i.e. meeting) by searching through the file.
Click on "Find" located in the Home tab. Once the Navigation menu opens, click into the search box and type in the word you're seeking, followed by the magnification icon or hit Enter—Word will highlight and display the results in the Results tab on the left.
I suggest highlighting each matching word with your cursor and then selecting the "Highlight" icon found in the Font section under the Home tab. This will highlight the word selected in the default yellow color, but you can also select the drop-down arrow and select a different color.
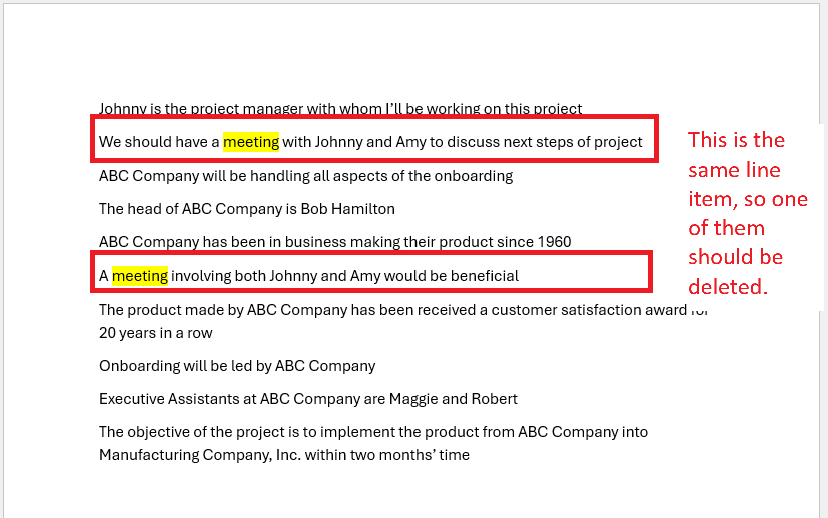
Now that we have found and highlighted the words, check each line item and remove any redundant or unnecessary line items. Do the same above steps for other redundant items, like the redundant line item about ABC Company handling onboarding.
Arranging Line Items Into Sections
With the redundancy out of the way, we can now focus on ensuring that the remaining items are more manageable and organized by placing them into sections. Placing notes into sections makes them easier to read and skim is an excellent starting place for organization.
The first step to organizing your line items into sections is to determine what you'd like to call each section. For example, I defined four sections based on my line items and created headers for them. To create a header, click on the heading size you would like to use under the Styles section of the Home tab—I used Heading 2.
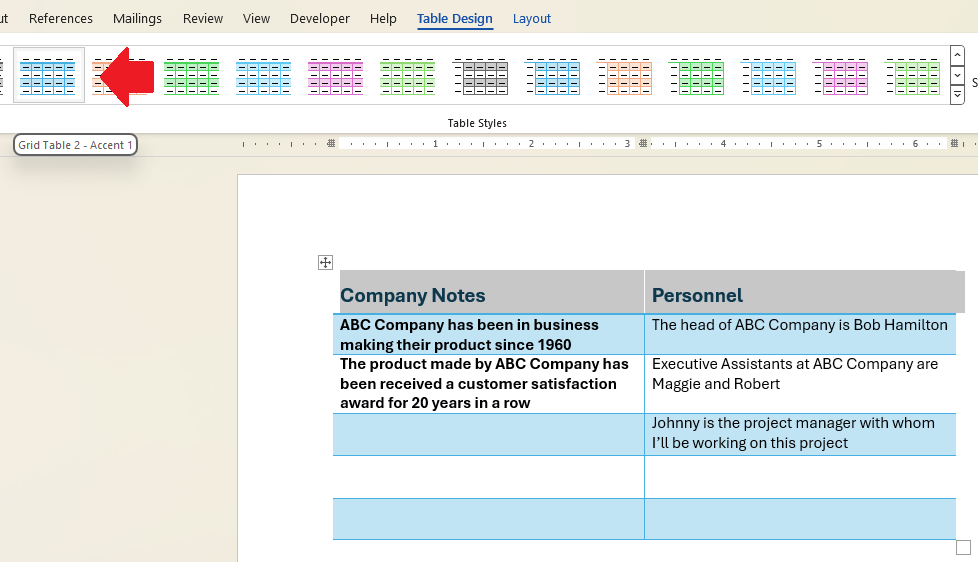
Now that we have organized the line items into sections, we can apply some additional styles to further enhance our organization. I will use tables as a way to make certain line items stand out from the others. As an example, it seemed helpful to have personnel information alongside the company notes, so I made sure they're both placed in one table. To create a table, click on the "Insert" tab, followed by the "Table" drop-down menu under the Tables section.
Select the number of columns and rows for your table from the predefined grid or click on the other options along the bottom to further customize the table.
For an even more visual enhancement, I would suggest looking at the variety of table style options available in the "Table Design" tab that appears when your cursor is in the table. In my example, I used Grid Table 2 - Accent One, which can be found in the second line of the Table Styles. Feel free to choose from the available options that work best for you.
Creating A Template
If you're reading this far you may be thinking, "Couldn't I have just started with some sort of template that would have allowed me to collect my notes in a more organized manner, instead of having to do all of this manual organization myself?" Yes, you can create or modify an existing template, download one from Microsoft, or use one of the built-in options.
There are also a number of templates available when you open Word for the first time. To select from the available templates in Word from the Home section, click on "New," then click into the "Search for online templates" search box and type in the keywords of template types you are looking for, followed by the magnification icon or hit Enter—the available templates will be displayed to you. The templates available are for both office and personal use.
Coming back to your document, let's say that you'd like to save the overall look and feel for future use; you have the option of saving the file as a Word template. This option allows you to reuse the headers and sections for future use as you need to use them.
Taking notes in Word is a key part of collecting data and information for all of us, whether that is in the workplace or even at home for our personal notes. By using the basic tools outlined above and organizing your notes and thoughts, your chances of interacting and putting these notes into action increase exponentially when they're in an easy-to-view format.
When you subscribe to the blog, we will send you an e-mail when there are new updates on the site so you wouldn't miss them.
About the author
I Got A Virus and I Don't Know What To Do!
I Need Help!

Comments