Tech News
How to Record Your Windows, Mac, Linux, Android, or iPhone Screen

Screenshots are great, but sometimes, you need to create a video recording to really get your point across. You can record your computer's desktop, your smartphone's screen, or your tablet's display. This process gives you a video file, which you can do whatever you like with.
Windows
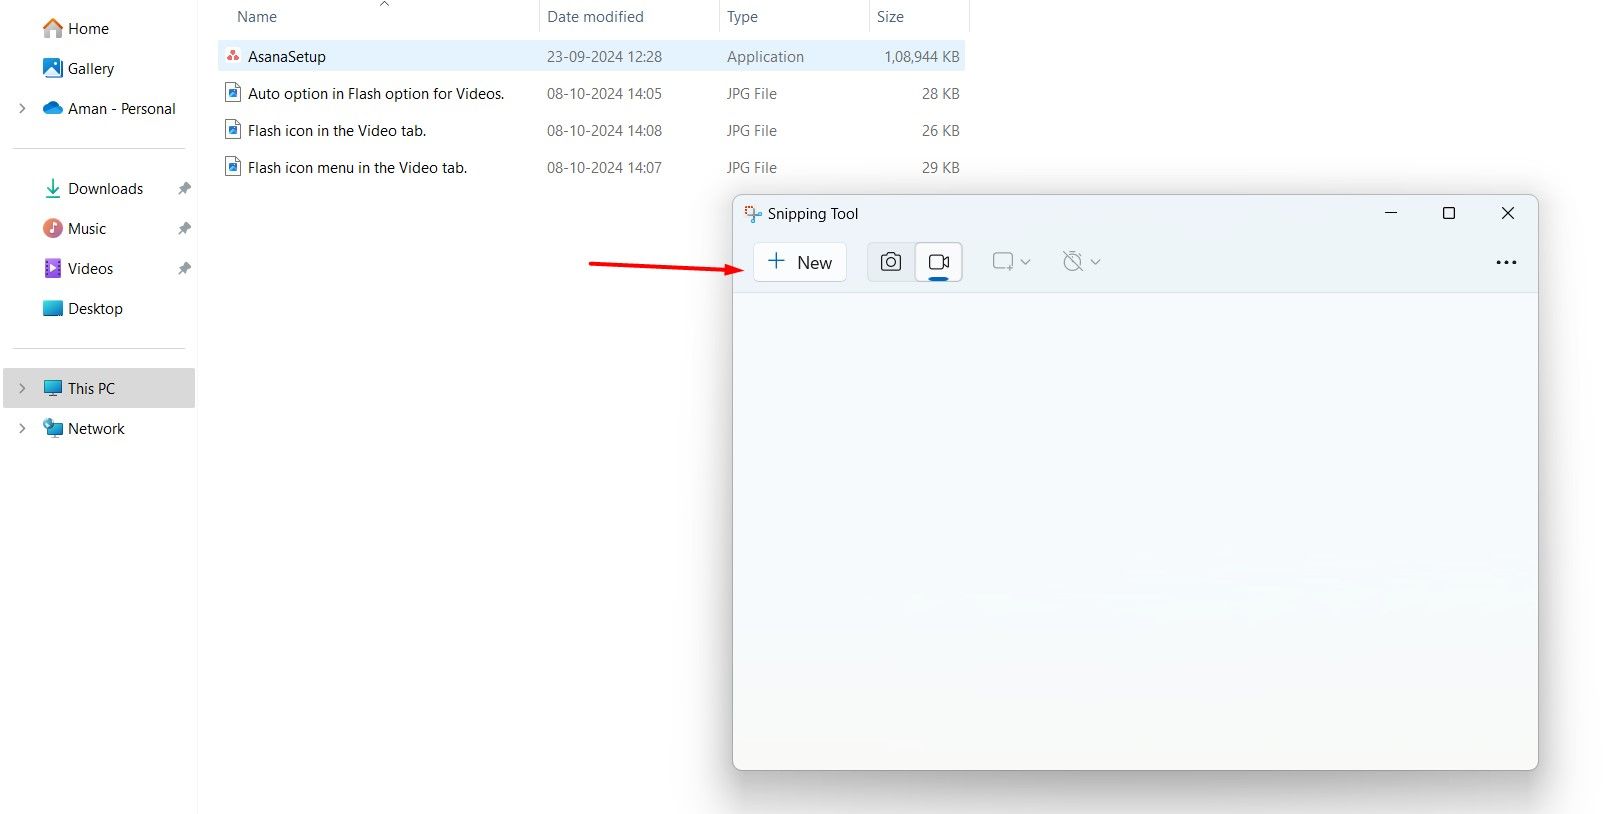
Windows 11 includes a built-in tool for recording your screen, so you don't need to install anything—just use the Snipping Tool to create a quick desktop recording. To use it, open the Start menu, type Snipping Tool in the search bar, and hit Enter. In the Snipping Tool window, click the video icon at the top.
Next, go to the screen where you want to start recording. Then, click the Snipping Tool icon in the taskbar to reopen it, and click the "New" button.
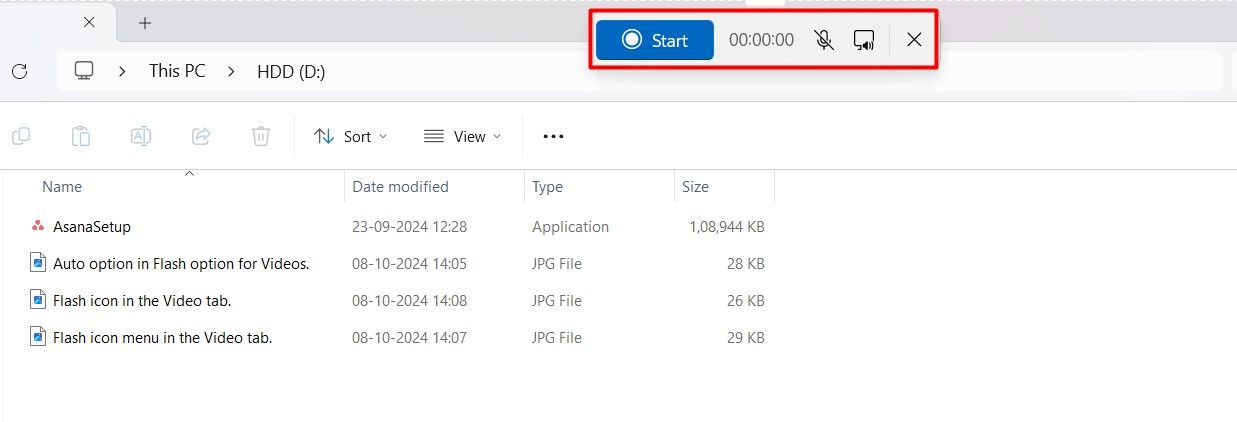
Select the area you want to capture in your screen recording. After that, choose whether to keep the microphone and system audio on or off. Once you've configured all the settings, click the "Start" button to begin recording. The Snipping Tool will start recording the selected area after displaying a 3-second countdown. You can pause or stop the recording by selecting the respective icons.
For more advanced screencasts, I recommend OBS (Open Broadcaster Software). It's a powerful, free, open-source tool that allows you to do a lot more than the Snipping Tool. Insert watermarks, embed a video of your webcam while capturing your desktop, or capture multiple windows at once and position them wherever you like.
OBS is widely used for video game streaming on Twitch because it's so powerful, but it works just as well for creating a professional-looking video of your desktop.
Suppose you want something even more powerful that also comes with editing capabilities. In that case, you can pay for Camtasia, which doesn't just record your screen, but contains powerful video editing tools as well. Just be warned, it's not cheap. Luckily they do have a free trial, so you can test it before you buy.
macOS
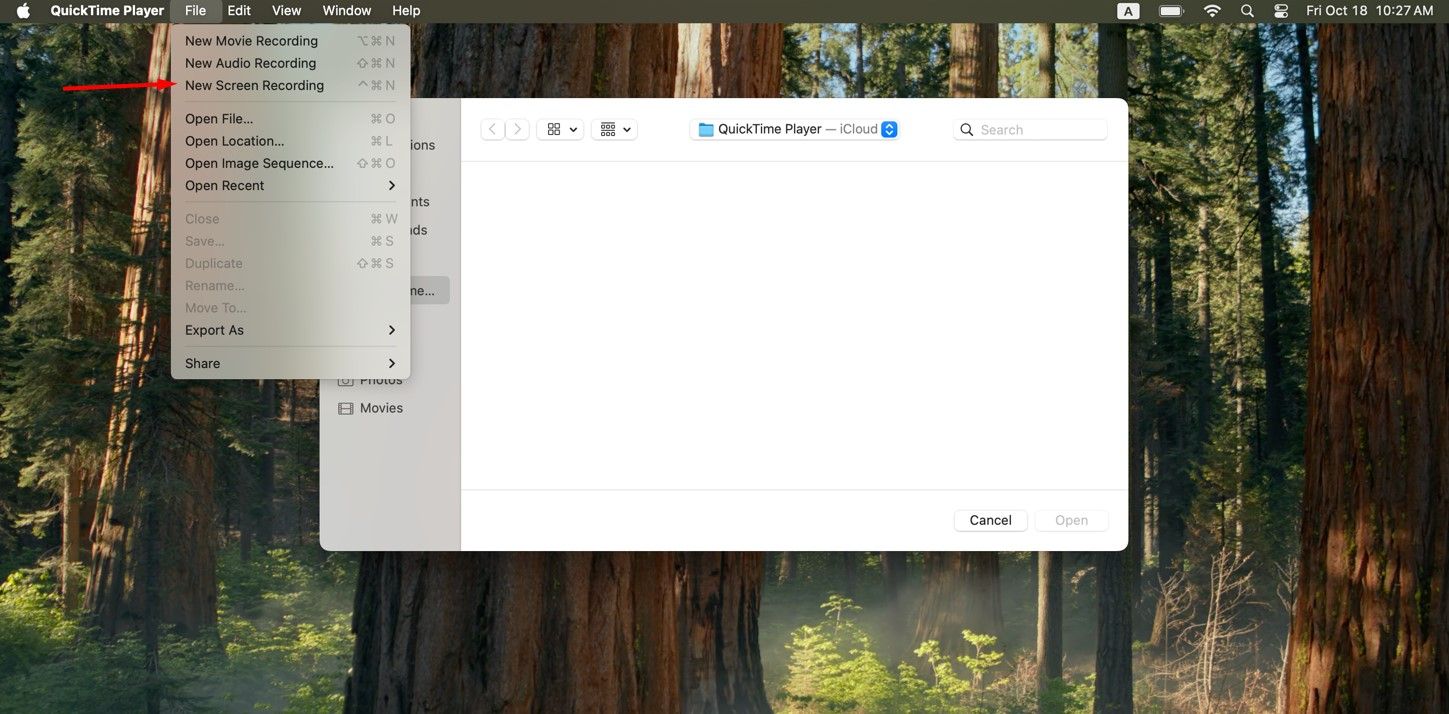
macOS offers a convenient, built-in screen-recording tool. It's one of the many useful functions hidden in QuickTime, which is more than just the simple media player it looks like on the surface. To record your Mac's screen, open the QuickTime application and click File > New Screen Recording.
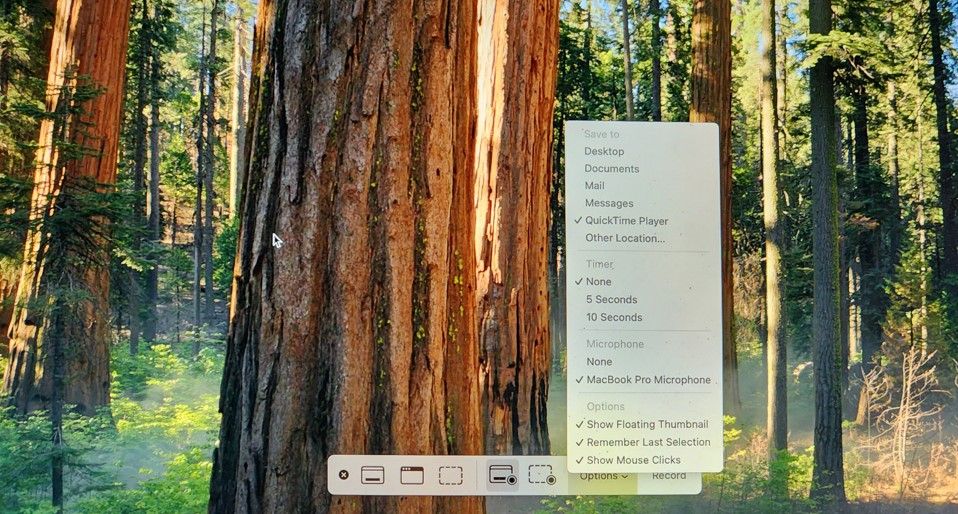
You can then click the "Options" button on the left of the Record button and choose whether you want to capture audio from your microphone in the video, too. This will allow you to narrate along with your actions. Click the "Record" button to start when you're ready.
QuickTime will minimize itself to a small icon on the right side of your menu bar and start recording. Click the stop icon when you're done, and you'll be able to preview and save your video. QuickTime can also edit the video, trimming out any unnecessary bits.
For something more powerful, you may want to try OBS. It's not just for Windows—it works on Mac, too. Suppose you want something even more powerful that also comes with editing capabilities. In that case, you can pay for Camtasia, which has powerful screen recording and video editing tools, but as I mentioned earlier, it's not cheap.
Android
Most modern Android smartphones, whether from Google, Samsung, OnePlus, Mi, or any other reputable brand, come with a built-in screen recording tool. While the exact steps to access the built-in recording tool may vary across Android brands, the general rule of thumb is to open the control center and select the screen recording icon.
I have an Android device from Poco, so I'll show you how to access its built-in screen recording tool. Open the Control Center and tap the screen recording icon. In the screen recording tool menu, click the gear icon to configure the recording settings. You can adjust the screen recording resolution, video quality, frame rates, and more.
Once you've set everything to your preference, tap the record icon to start recording. When you've captured the content, you can stop the recording by tapping the stop icon.
However, if your Android smartphone doesn’t have a built-in screen recording tool, or if it's not working, or you want more control, you can download a third-party screen recording app from the Play Store. I recommend AZ Screen Recorder. It has a lot of features, allowing you to control video quality, record your voice, add a watermark, or even record video from your camera.
iPhone or iPad
Similar to most Android phones, iPhones and iPads also come with a built-in screen recording tool. To access and use the tool, open the Control Center on your iPhone or iPad and tap the screen recording icon. The screen recorder will start recording after a 3-second countdown. When you want to stop the recording, tap the red recording icon in the top-left corner of the screen, then choose the "Stop" option.
If you want more control over your screen recordings, you'll need a third-party screen recorder. I recommend trying to Record It, which offers exciting features like adding video reactions with audio commentary to your recordings.
Linux
Your Linux system also comes with a built-in screen recorder. To access it, press Ctrl + Alt + Shift + R on your keyboard. In the recording window that appears, switch to the "Video" tab.
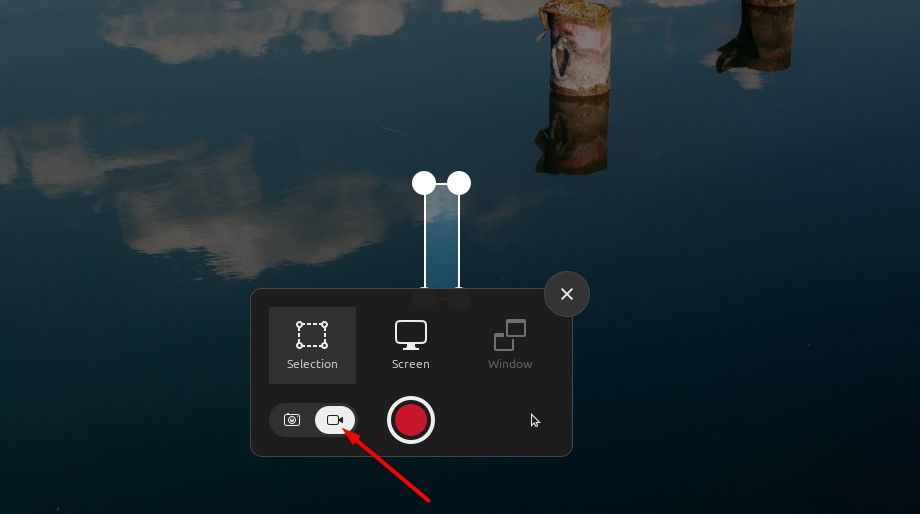
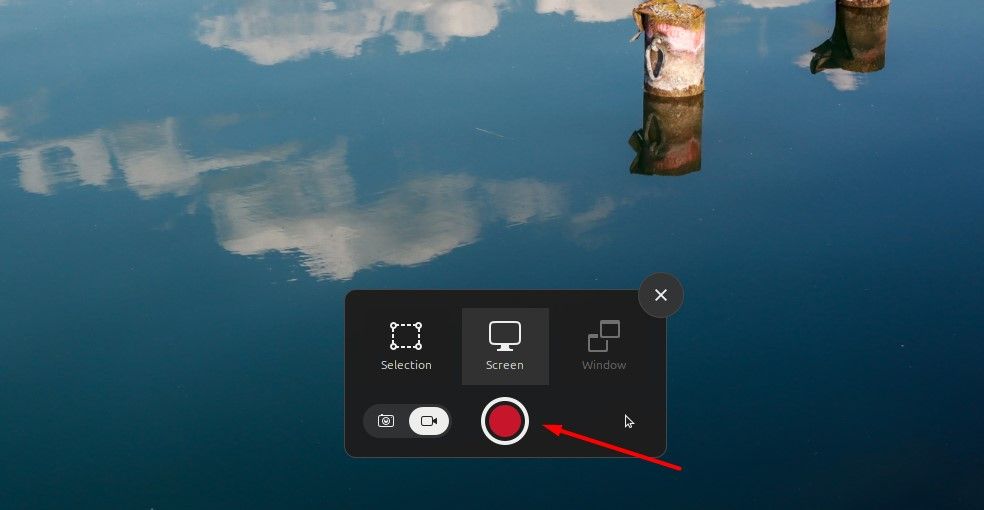
Choose whether you want to record the entire screen or just a particular portion of it. After that, click the "Record" button to start the recording.
When you're done recording, you can stop it by clicking the stop icon in the top bar.
There are also several open-source screen-recording applications for Linux, and you'll likely find many of them if you open your Linux distribution's package manager and do a quick search. There's even a way to do this with FFmpeg and other commands from the terminal if you're into that sort of thing.
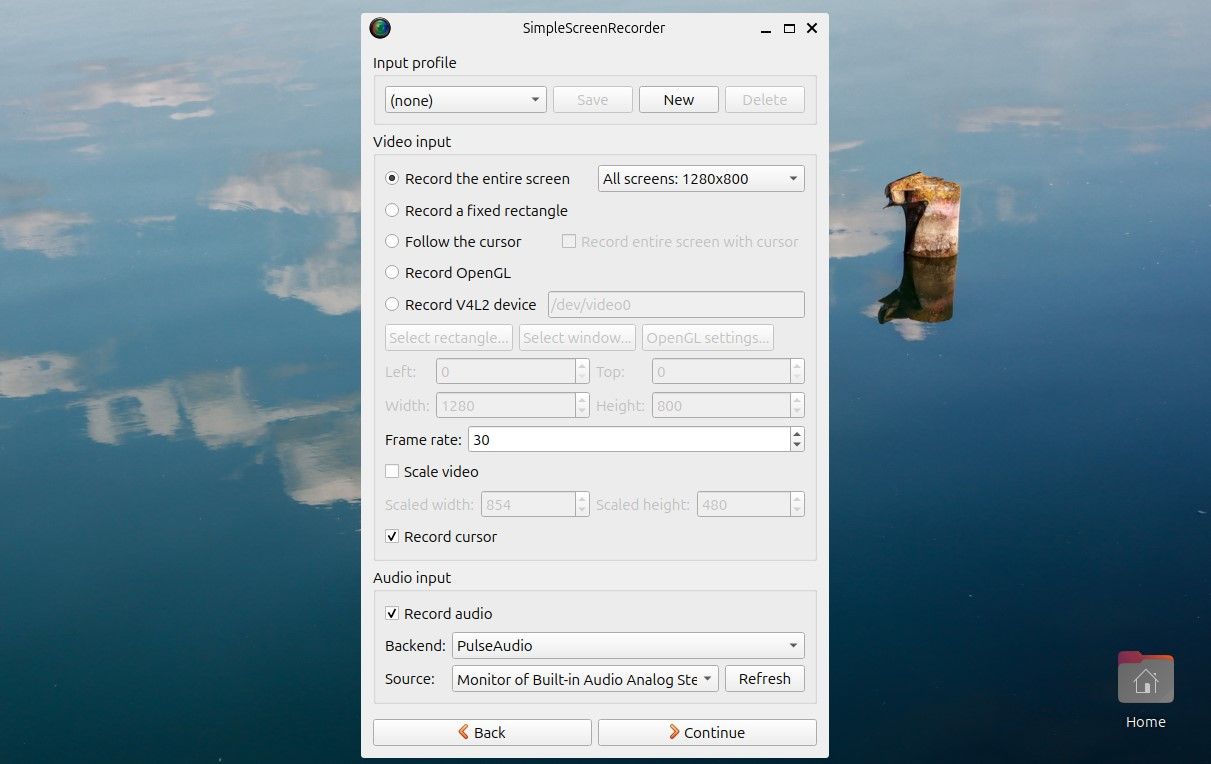
One of the most popular options you can install is SimpleScreenRecorder, which you can get from the Ubuntu App Center or install through the Terminal with the command sudo apt install SimpleScreenRecorder.
Launch SimpleScreenRecorder and use its options to choose video and audio quality levels. This tool can record your entire desktop or just a small portion of it. SimpleScreenRecorder works well, provides a simple interface, and offers the most important desktop recording options.
If you want something more powerful, try OBS. It's available for Linux as well as Windows and macOS.
This covers how you can record the screen on Windows, Linux, macOS, Android, and iPhone or iPad. Weren't the steps easy and straightforward? Once you're done recording, you can use tools like VLC, which is available for all operating systems, to watch the recorded video.
When you subscribe to the blog, we will send you an e-mail when there are new updates on the site so you wouldn't miss them.
About the author
I Got A Virus and I Don't Know What To Do!
I Need Help!

Comments